Travel

My Tips for Packing to Travel with Kids for Spring Break

My Tips for Packing to Travel with Kids for Spring Break | Writing Between Pauses

It goes without saying: almost everyone loves the idea of traveling, but the actual traveling is hardly anyone’s favorite part of it. Moving from A to B, B to C, and C to every other letter of the alphabet definitely takes more patience than anything else.

Now add to that a child, who may or may not be old enough to understand patience (or might just not feel like it at that moment), and things get really sticky. I’ve written about traveling with young toddlers before in the form of everything I learned about taking a (mostly) solo road trip and my 4 tips from when we went to Disneyland (and drove the whole way).

We were just recently looking at our photos from our trip to Disneyland. It’s funny to think that was two years ago—and Fo looks so small in all the photos! He was a younger toddler then and now he’s a kid—and things are definitely different now.

When we first had Forrest, it felt like we might never be able to travel again. Even just a trip to the mall felt like I needed to pack an entire army—and if we did travel anywhere, it felt like I had to pack up my whole house and just take it along. We ended up at our destination with bags and bags and bags of stuff for just a few days! And don’t get me started on the pain in the ass it was to take along all my pumped milk, plus my pump, plus formula, plus bottles… I still remember trying to label the tops of my expressed milk to take in the car on our first spring break road trip after having Forrest, pumping in random parking lots throughout the 9 hour drive there, and much more.

I’ve definitely been able to streamline things as Forrest has gotten older, especially when it comes to packing. I thought I’d share my tips for how I keep everything organized in the car. If you’re planning to travel (for the first time or the 100th time) with kids this Spring Break, this one is for you.

1. Invest in Boxes

The best decision I made before going to Disneyland nearly two years ago was buying 2 clear packing containers. They are about a foot deep, measuring 12 inches by 10 inches at the lid. They aren’t super big, but they aren’t teeny tiny either. I used them to pack supplies for Forrest on our trip and so they would be easy to stack and see inside of.

When I tell you I use these every single road trip now, I’m not joking! They make it so easy to keep supplies together. I tend to keep all our travel stuff in one of them; that includes things like sunblock, our emergency kit, some non-perishable emergency snacks, and things like that. I also keep the small DVD player we use in the car for Fo in that bin as well, just so I always know where it is!

2. Everyone Gets One (1) Bag

I’ve definitely made the mistake in the past of packing In a way that doesn’t make a lot of logical sense, like packing one bag for clothes and one bag for makeup. In general, I know if I need more than one suitcase, I’m probably overpacking and need to talk to myself about what I’m doing.

Overpacking is a great way to ruin your spring break (especially the traveling portion), so our rule now is: everyone gets one bag, even Forrest. He gets one bag for clothes and toys. That keeps us from overpacking and means we have room for everything else we need, or any souvenirs we might pick up on our trip.

3. Keep Snacks Contained

My husband Danny and I are very big on travel snacks. It gives us something to do as we drive (especially on a long road trip) and also makes it easy to keep Forrest occupied (“throw him another snack”). I know this isn’t the healthiest way to travel, but honestly, what’s the fun in having a super healthy Spring Break? (Ok, there might be some fun in it.)

We often have this issue of snacks getting absolutely everywhere in the car: bags of candy in the glove box, bags of chips open in the backseat, you know the drill. Suddenly, I need to vacuum my car really bad.

We designate one spot for snacks in the car (as well as where we store extra drinks and water) and really stick to it now. This keeps me from absolutely feeling like I’m losing it and also keeps the car clean. We usually choose the space behind the passenger seat, as it’s easy for Danny to get out and grab (as I usually drive).

4. Think About What You’ll Need Access To

Have a DVD player for your kiddo? Keep movies within arm’s reach of the passenger seat.

Know you want to drink lots of water? Keep water bottles handy within reach.

Pack your car so that you have access to the things you know you’ll need to grab as you drive—and don’t worry about the rest. Charging cables and extra battery packs can be kept in the glovebox or console; books can be kept in door pockets. Pack accordingly.

5. If you’re stopping midway, think of what you’ll only need for that night.

We often have a bin (throwback to item one on this list!) that is just things we need for at night. Oftentimes, we break up long drives with a stay overnight along the way—traveling with a toddler, it’s just easiest for us. We don’t want to totally unload the car, so we usually just take what we need: our bags, our snacks, and the overnight bin (as well as anything valuable, like laptops). That means leaving in the morning is way less hectic as we don’t have to repack the entire car.

6. Remember a Trash Bin

All those snacks, as well as stops along the way, wiping faces, and more… you need a trash bag. I usually grab 4-5 plastic Target bags and stow them in the car, then we use this as trash bags through the drive, throwing them away whenever we stop. It just makes it so much easier to keep the car clean if you have a specific spot to put trash.

Here's What I Learned from An Autumn Road Trip (with a Toddler)

Here's What I Learned from An Autumn Road Trip (with a Toddler) | Writing Between Pauses

I am not a traveller.

I know, I know. It seems like everyone these days talks non stop about traveling. Everyone wants to travel and see the world. And in some ways, I definitely want to see the world. But I don’t like traveling.

I don’t like driving for long periods of time. I don’t like airplanes. I don’t like the stressed, naked feeling of being transitional between two places (home and destination). I don’t like the anxiety it gives me. And now that I have a small human I’m responsible for, I absolutely do not like having to pack up everything I can think of for him (including but not limited to: blankets, toys, any medication he might need, extra food, juice, cups he can use, forks he can use, emergency meals, and milk). The amount he needs has consistently gone down since he was a baby (no more giant container of formula, bottles, bottle wash, sanitizer bags, Pack’n’Play, and more), but it’s still a lot.

And doing it by myself? Excuse me, no thanks.

Well, I did just that on Friday. Danny had gone over to Central Oregon (Sunriver, to be exact) for a teaching conference in Bend. My parents have a cabin in Sunriver, so we had decided it would be a family vacation. But with Forrest in school now, I didn’t want him to miss a day so we planned to go over once he got done with school.

As the days lead up to Friday, I started to seriously panic. Taking a three-hour plus road trip by myself with a toddler? Packing up the whole car on my own? I was nervous. Danny told me he would be fine if I decided not to do it, but I knew he really wanted me to. And of course, Forrest was excited at the prospect of a vacation. Nothing makes him nervous.

As I wrote on Instagram, I didn’t want my anxiety to make Forrest miss out. Yes, it would have been better for me personally to stay at home for the weekend. But Forrest would have missed out on some potential fun and that prospect made me sad.

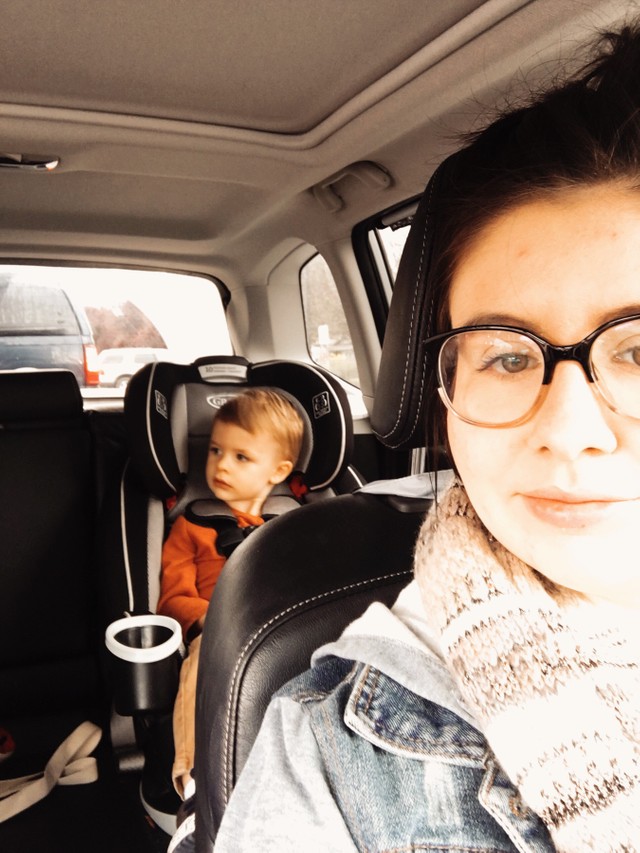
So I did it. On Friday afternoon, I packed up the car, got Forrest a Happy Meal (no judgement), and drove 3 hours with a potty trained toddler. Here’s everything I learned.

Road Trip 1
Road Trip 2

1. It’s probably going to all be fine.

Probably. My biggest worry was that, while going over the pass, Forrest would need to use the bathroom. Since he’s relatively newly potty trained (it’s been about 3 or 4 months), when he has to go, he usually has to go immediately. This is fairly normal for preschool age kids. However, while driving across a mountain pass, the last thing I wanted to do I was pull over and break out the little potty we keep in the car. However, my anxiety was for nothing: we stopped at a rest area before the pass and he was fine all the way until we got to the cabin.

So yeah, the thing you worry about? It’s probably going to be fine. (Please remember to tell me this next time I go on a real vacation aka go flying.)

Road Trip 2
Road Trip 4

2. It’s ok to do things you normally wouldn’t (or that you would).

I had all these plans for things Fo and I would do. Museums. Outdoor parks. Everything. I wanted him to have as much fun as possible while we were on our own mini-trip, especially as Danny was still in a conference on Saturday. However, we ended up going for a nice long walk to get coffee and a treat, then went shopping and spent time relaxing in the cabin. I felt bad that we hadn’t done any of the exciting stuff I had planned, but we did have a nice lunch out together (my first time taking him to a real restaurant on my own) and he really has fun no matter what.

Road Trip 6
Road Trip 5

3. The weather won’t cooperate, but that’s fine.

Part of the reason we didn’t do all the fun stuff I had planned? It was raining! I think of Central Oregon as very cold and relatively dry. But it had been raining at home and that rain followed us on vacation. So, the museum I wanted to go to? Mostly outdoors. The walking trails? Off limits thanks to the puddles and downpour. We made it for our walk in the morning, but that was about it. We had fun jumping in puddles outside the cabin, then retreating inside to warm up and go pick up Danny from the conference. The weather wasn’t really what I had planned on, but that’s Autumn for you, really!


This is a much more personal post than I usually post for Blogtober, but I thought I’d try something different! I had so much fun over the weekend (even when Forrest pretended to have a stomach ache to get us to leave dinner!) and I tried something outside of my routine—and it was all fine! What’s something you are challenging yourself to try this Fall?

How to Maintain Your Skincare Routine While Traveling

skincare routine while traveling.png

I know I'm not the only one who feels like traveling does an absolute number on my skin. Switching between different time zones, climates, and more can make my skin go absolutely haywire. Case in point: I spent a week in Idaho this month and even though I kept up my skincare routine, I was left with rough, bumpy, red, dehydrated skin by the end of the week. *Cut to me whining here.* 

Skin is a delicate thing. Sometimes, I wish I worried just a little bit less about my skin--but I've been chasing "perfect skin" for a long time. I know it's not going to be attainable; skin is supposed to have texture, pores, and more. But dryness? Redness? Irritated bumps? No thanks. 

Without further ado, let's talk about how to maintain your skincare routine while you're traveling--and that includes packing everything up. 

1. Narrow down what you need to bring. 

I think most people with serious skincare routines experience that our routines are changeable, depending on what's going on. A prime example, for me, is that if I'm noticing a lot of dryness, I'll use a hyaluronic acid mask or serum; if I'm breaking out, I'll stop using whatever foundation is hurting me and start using a little extra jojoba oil. It's a balance and unfortunately, on vacation, you're stuck with the bare essentials of your routine. So narrow everything down: what is the order of things you do every single night? For me, it includes: 

  • Make up remover: jojoba oil 
  • Face wash: The Body Shop Tea Tree Face Wash
  • Toner: Mario Badescu Rose Toner
  • Moisturizer: Pacifica Crystal Youth moisturizer

That's just the barebones essentials, the things I know will keep my skin as good as it can, even in dry, super hot weather. 

2. Packing it up. 

Now, how do you pack all things? Personally, I do not like traveling with my giant bottle of jojoba oil and face wash. I try to keep my packing to a minimum. So here's what I do: I put dollops of everything I need in contact cases. You heard me: those little wells are perfect for packing two or three days worth of oil, moisturizer, and face wash. I usually use one case per item. You can buy a value pack of contact cases that are color coded at Target. Then, I just pack those contact cases into a makeup bag, along with a few other essentials. They are less likely to leak and help you stay organized. 

3. Making time. 

This is the hardest bit on vacation, isn't it? Making time to actually wash your face at the end of the day instead of collapsing into bed with some room service or snacks. The way I do this is that it gives me about 10 or 15 minutes to decompress every evening of vacation. I find traveling very stressful (I'm actually not a huge fan!) and so those 15 minutes are my life blood; I need them in order to sleep well and make it through the next day. It also helps ground me and make me feel a little bit more at home. And if my skin is going haywire from the weather or a different climate, well, it makes me feel like I'm doing a little something that makes a difference. 

4. Correcting when you get home. 

Maintaining your routine while traveling can go a long way towards ensuring that your skin keeps looking great. But a lot of things are out of our control on vacation. As I mentioned, my skin got incredibly dehydrated while I was in Idaho: not dry, but I started noticing bumps and redness that is typical of when my skin is in need of some major TLC. Once I got home, I started using rosehips oil (great for when your skin needs extra moisture, as well as to reduce redness) and my hyaluronic acid mask. If your skin decides to go off the rails while you're on vacation, you can always pop into a drug store for a mask or add an extra moisturizer to your routine; and when you get home, you can take steps to baby your skin and give it that extra TLC. 

4 Essential Items for Spring Travel

4 Essential Items for Spring Travel | Writing Between Pauses

It's Spring Break! At least for my husband, Danny. We always look forward to spring break because we spend it either visiting his parents or relaxing. This year, his parents are coming to us. 

I try not to turn trips into excuses to buy a whole bunch of new stuff. But there is something very exciting about treating yourself to a few little things for your trip, whether it's just a new makeup bag or an outfit. I put together a list of 4 great essential items to treat yourself to this year. Whether you're leaving tomorrow or in a few weeks, these will be perfect to take along. 

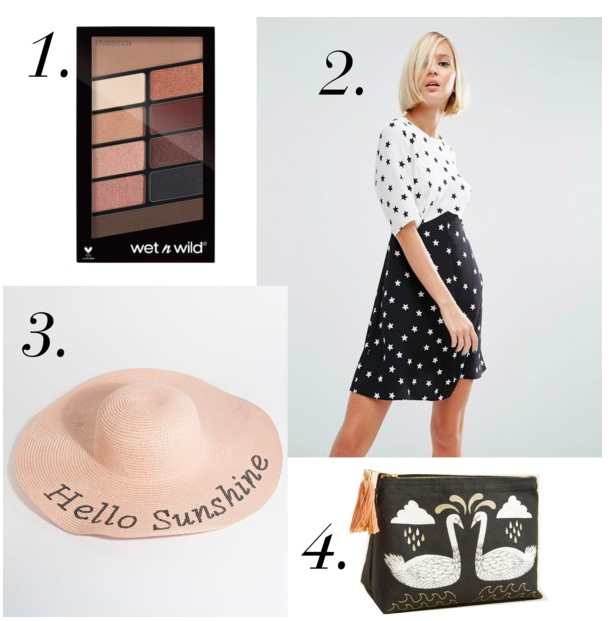
Spring Essentials Graphic

1. Wet'n'Wild 10-Pan Palette in "Nude Awakening", $4.99

I know what you're thinking: a $5 Wet'n'Wild eyeshadow palette? Listen, I thought the same thing when I first bought one of these palettes (they have them in 4 different color stories). But these shadows are really, really good. The Rose in the Air one is a dupe for Modern Renaissance. This palette is perfect for every kind of look: simple day looks, single shadow looks, and smoky, dramatic night looks. And for only $5, it's a total steal. 

2. ASOS Mix'n'Match Star Print Dress, $23

This dress is so cute: long enough without being fussy. And no weird cut outs. (Trust me, I checked.) I love the mix of star prints, as well as the shape; with the nipped in waist, it flatters every body type, but isn't so cinched that you'll be uncomfortable. 

3. Unique Vintage Hello Sunshine Sun Hat, $32

A sun hat, especially if you're traveling somewhere very warm, is an absolute must. Protecting your skin will keep you looking flawless. (So don't forget SPF either and if you tan, you're still damaging your skin!) I love this one from Unique Vintage; it's almost like it was made for cute Instagram photos. While it's a little spendy for $32, it's very sturdy and will hold up to just about everything. 

4. ModCloth Swan for the Books Make Up Bag, $14.99

Going on a trip means you need a new makeup bag, right? This one from ModCloth is so cute--and sturdy. I love the swan print; it's cute without being "too much." It's the perfect size for carrying everything you need for a short trip. Plus, it's on sale right now! 

The 5 Best Apps for Disneyland

the 5 Best Apps for Disneyland

I've written two posts about going to Disneyland in June: tips for taking your toddler here; and everything you need to pack into the parks here. I wanted to write just one more: the apps that made our Disneyland experience much, much better and easier. 

Apps are definitely not something I first think of when it comes to Disneyland. Isn't that odd? But my last two trips, I have found myself downloading apps while in the park so we can better plan our day. Want to know what I used on our most recent trip? 

1. The Official Disneyland App

Cost: Free

This is honestly my favorite app. It connects to your Disneyland account, so when you get photos with a character or at a landmark, you just scan the card they give you and it automatically adds the photos to your account. It makes it much easier to purchase photos later! (Note: They are expensive!) Also, the Disneyland app has wait times for everything, from gift shops to rides. It's great for figuring out official wait times, what's broken down, and where crowds are congregating. 

2. MouseWait

Cost: Free

MouseWait is another wait time app, but what I specifically like about it is that it shows the capacity level. I don't know exactly how they calculate this, but it shows at what percentage capacity the park is at. In the off-season, the numbers are anywhere from 10-40%, which is really low and manageable. In the summer, anything over 85% is going to mean crowded walkways and long lines. Danny and I like to go in the morning, then leave once it starts to hit 70%+, then return at night when it's dropped back to 65%ish. 

3. Hidden Mickeys: Disneyland 

Cost: $5.99 

It's not all planning! Hidden Mickeys is a great app for identifying and collecting Hidden Mickeys. Hidden Mickeys are not really my thing that I enjoy collecting, but I do love finding them spontaneously. This app is a lot of fun though, especially if you're a Disney fanatic who wants to find every single one on your trip! 

4. Maps

Cost: Free

"Michelle," you whisper, "That's an app that comes on everyone's iPhone." Yes, and? It's the best. If you have Maps and an iPhone, you can share your location for a single day with everyone you know. That means if, say, you and your husband decide to split up while you change a diaper and he grabs FastPasses, you don't play a super fun game of hide-and-seek in a super crowded part of Main Street USA. My husband and I did this to make our lives easier; we shared locations each day in Disneyland so we could find each other if we got separated. It works like a charm! 

5. A Color Story

Cost: Free 

A Color Story is my favorite photo editing app. It's perfect for fixing up those quick photos you take in the park because you can save pre-set directions depending on how a photo looks. At the end of each day, I would lie in bed at the hotel with ice on my shins (I am old) and edit photos. Because that's what I do. 

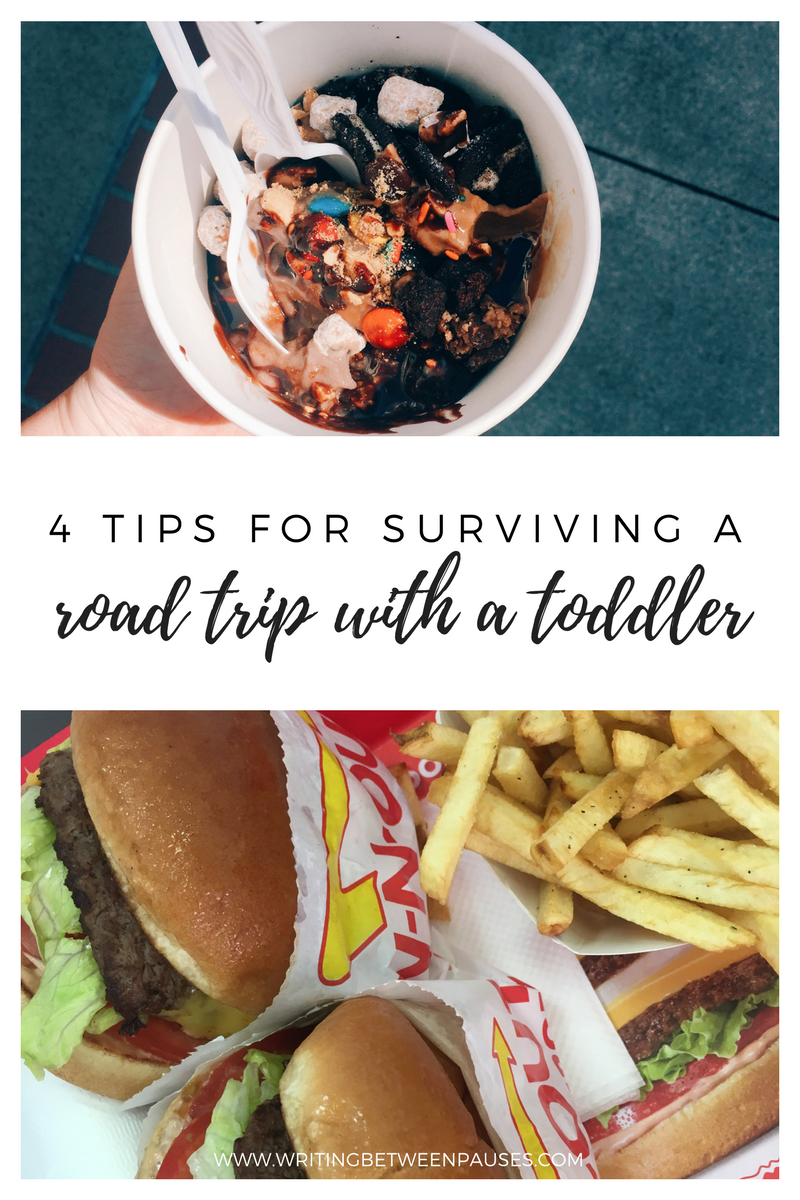
4 Tips for Surviving a Road Trip with a Toddler

road trip with toddler

The trip to Disneyland, from where we live in Oregon, takes about 15 or 16 hours, give or take. 

15 or 16 hours, in a car, with a young toddler, can be torture. We had done a few road trips to places like central Oregon and Idaho, but nothing quite like two solid days in the car through the entirety of California. 

A few of my friends suggested driving at night so that Forrest would sleep. A few of them actually did this and had it backfire around the same time as our trip. The truth is, your toddler is not going to sleep great in the car, even if they normally sleep amazing in the car. If they're going to be in that seat for 14+ hours, they aren't going to sleep there very well. So prepare yourself for minimal naps and early bedtimes in hotels. 

We made it though, with minimal tantrums. How did we do it? Here are our 4 tips. 

1. Buy a DVD player for the car. 

Listen, I know. I always said I would never. But then my son reached toddler age and, you know what? Sometimes, you need to just distract them. A DVD player is perfect. We brought a collection of DVDs for him: Zootopia, Peter Pan, a Sesame Street DVD, a Barney DVD, and Toy Story. By the end of the trip, he was singing the theme from Zootopia whenever he had the chance. 

2. Bring snacks. 

When all else failed, we handed Forrest something to snack on. He is particularly fond of cereal bars, so we brought those, of course, as well as Goldfish, bananas, and apple juice. While sometimes he just made a mess (in the last 20 minutes driving home, he opened his milk cup, dumped it all over himself and the seat, and then mashed a cereal bar into it); otherwise, it was exactly what he needed to get over a tantrum. The first rule of toddlers is, if you can, distract them.   

3. Have someone ride in the back with him or her. 

For us, this was big: sometimes, it seemed like he was just lonely in the backseat. So, we would rearrange things and my husband would ride in the backseat with him. They would read books, watch Barney together, or just point out things along the road. 

4. Stop frequently. 

I hate stopping during road trips. I am goal oriented and, often, for me the goal is getting to our location. But with a toddler, it’s good to get out and walk around. We stopped at every other view point or rest area and got out just to stretch our legs; Forrest would walk around with his safety harness. We’d grab a snack or a soda and sit outside for just a few minutes. 

Everything You Need for Disneyland with a Toddler (& Nothing You Don't)

packing for disneyland with toddler

Earlier this week, I shared my three tips for making Disneyland with a toddler just a little more enjoyable. (At least, what I will remember for next time! You live and learn, after all.) Now, it's time to talk about what, exactly, you should pack. 

When we first started planning our trip, I downloaded every Disneyland packing list I could find. I devoured packing lists. I read blog post after blog post. I made lists. I bought clear plastic containers at Wal-Mart to pack snacks and more in. I organized and fretted and bought extras. 

Here's the truth: we didn't touch maybe 75% of what I packed. It was just extra. Totally useless. We didn't need it. Maybe in an emergency, we would have needed it, but realistically, in the park, I wouldn't have access to my two plastic tote bins of medical supplies, band aids, life vests, and more. I would only have what was in my very stylish fanny pack and the stroller. 

This leads me to a very stark reality: everyone overpacks for Disneyland. We all do it. Realistically, if you go in the summer (and, if you can, do try to avoid it), it's going to be too hot to wear anything cute and you're going to sweat all over it anyway. Even more realistically, bags get searched going into the park area, so the more bags you have, the more you get searched. 

While going through security one day, the guard complimented me on the fact that I only had my fanny pack and Forrest's small backpack (which is actually a leash, but we'll get to that); little did he know that, originally, I had planned on bringing a cooler, a backpack, and way more crap... only to narrow it down after one very long day. 

The truth is, Disney makes everything available to you. At a price, of course. But what you gain is the ability to spend less time dealing with all the stuff you brought into the parks and more time just enjoying life there. 

With that in mind, this is my list of the essentials you need for Disneyland. 

  • Water. If you're driving, buy a Costco pack before you head down. If you fly, get an Uber to Costco in Anaheim and buy a pack there. Put as many bottles in the fridge as will fit.
  • 1 small bag. I'm talking small here. I bought this fanny pack (or bum bag, if you're British and think I'm very gross) before we left and I don't regret it. I looked extremely frumpy, but I was hands free. It had enough room to hold my ticket, my debit card and license, my cash, sunscreen, lip balm, and a few extra hair ties. I can also use it for hiking in the future.  
  • Sunscreen. Seriously. Just buy 3-4 bottles of sunscreen and take at least one in the park every day. I saw so many sunburned children and it broke my heart. Reapply every 90 minutes. 
  • Two snacks. Not a box of snacks. Not every snack ever. TWO SNACKS. Every day in the park, I packed my son a fig bar (his favorite) and a packet of applesauce. He always ate both, plus other snacks that we bought ourselves. 
  • For younger children: a bottle & formula; a water cup; diapers; and a pack of wipes. I bought travel packs of wipes to keep in Forrest's backpack, which we used as our "diaper bag." 
  • A "safety harness." Some people let their young toddlers run freely in the park because, ultimately, it is safe. However, Forrest is a runner and if I set him down, he would be halfway across the state if I let him. This is why we use a leash. This is the one we have. It gave Forrest some freedom in the park, without me having a panic attack that he was running straight at a pretzel cart. 

That's it. That's all you need. I know, right? Michelle, where's the Motrin? What about the band aids? A first aid kit? Ponchos? Jackets? Changes of clothes? Girl, leave that in the hotel room. If you really need it, you can go get it. If it's urgent, Disneyland does have first aid centers where you can get band aids. If you have small children, they have fully stocked changing rooms in the Baby Care Center on Main Street USA. You don't need to bring your whole kitchen in the park. 

3 Tips for Taking Your Toddler to Disneyland

disneyland with a toddler

Hi, I'm Michelle and I kind of royally screwed up a vacation to Disneyland. 

Ok, hear me out: I really thought my toddler would enjoy it. As I wrote in my newsletter over the weekend (oh, you don't get my newsletter? You can sign up here), I made the terrible mistake of assuming that my child was essentially a very small clone of myself and would enjoy everything I do. 

Well, lesson learned: you gotta ease your kid into it. You can't just jump on your favorite ride and think they'll be ok with it. Especially if you already know that your toddler is terrified of loud noises and enclosed spaces like elevators. Oops.

In all fairness to my husband and I, we've never really taken a family vacation before. We just didn't know a lot of things. And this trip gave us a chance to figure out how to make the most of even crappy situations. Midway through the second day, I wanted to cry; I felt like I wasn't having fun, like Forrest wasn't having fun. I felt really bummed. Instead of giving in and just calling it a bust and not trying, my husband and I talked it out: we came up with a plan to make our last day in the parks as fun as possible. And you know what? It worked. We really hit our stride. 

So, that's a really long way of saying: we made mistakes; we learned from them; we learned how to have fun regardless. 

This week, I'll also be posting my packing list dos and don'ts, so I won't be mentioning any tips relating to packing in this post. These, however, are my tips for making Disneyland a fun trip--something my husband and I didn't figure out until our last day (which really did redeem the whole trip). 

1. Adjust your expectations.

First and foremost, a toddler cannot and will not experience Disneyland the same way a child, teenager, or even adult does.  Toddlers, especially young toddlers, aren't great at drawing the line between reality and fake yet. To them, a lot of things seem "real" because they don't know any better. So when I took my son on Pirates of the Caribbean, he thought it was real. And terrifying. Can you imagine? 

Toddlers aren't going to want to ride the big thrill rides, or anything extremely dark and loud. To start, stick with the classics: the carousel, It's a Small World, and the Dumbo ride are great. If your toddler is apprehensive, pick a ride they can watch for a while to get a feel for what's going to happen. Also, take advantage of shops, walkthroughs, and character meets. They'll have much more fun with those than most rides. 

2. Download the Disneyland app. 

This really was a lifesaver in the park. The Disneyland app is a place where you can buy and link your tickets and Fast Passes, link your Photopass for character meet and greets, and get a list of waiting times for rides, meet and greets, and restaurants. Seriously. It was great for planning which area to go to next to maximize our time. It's also how we ended up meeting Tinkerbell with zero planning and zero line; we were the first people there! 

3. Establish a good routine.

The maximum amount of time Forrest (age 22 months) could handle in the park was... about 2.5 hours. Yeah, that's it. We got to the parks at 7:30, got in the gates at 8:00, and by 10, he was usually ready for a nap. We would walk back to our room, get him down for a nap, and then go to lunch. We would go back to the park from around 1pm to 3pm, then back to the room again for him to have some chill time: a movie, dinner, and milk, then bedtime at 5:30pm. 

After that, our other family members would stay in the condo with Forrest while Danny and I enjoyed the parks. It was a perfect situation. We got time with our son in the parks and then time with just each other. This won't always be possible for us, but it worked this time. And, hopefully, you'll find a routine that works with you too. You know your child best and you know your child's routine--and for the best vacations, honestly, that should be maintained as much as possible to prevent tantrums.