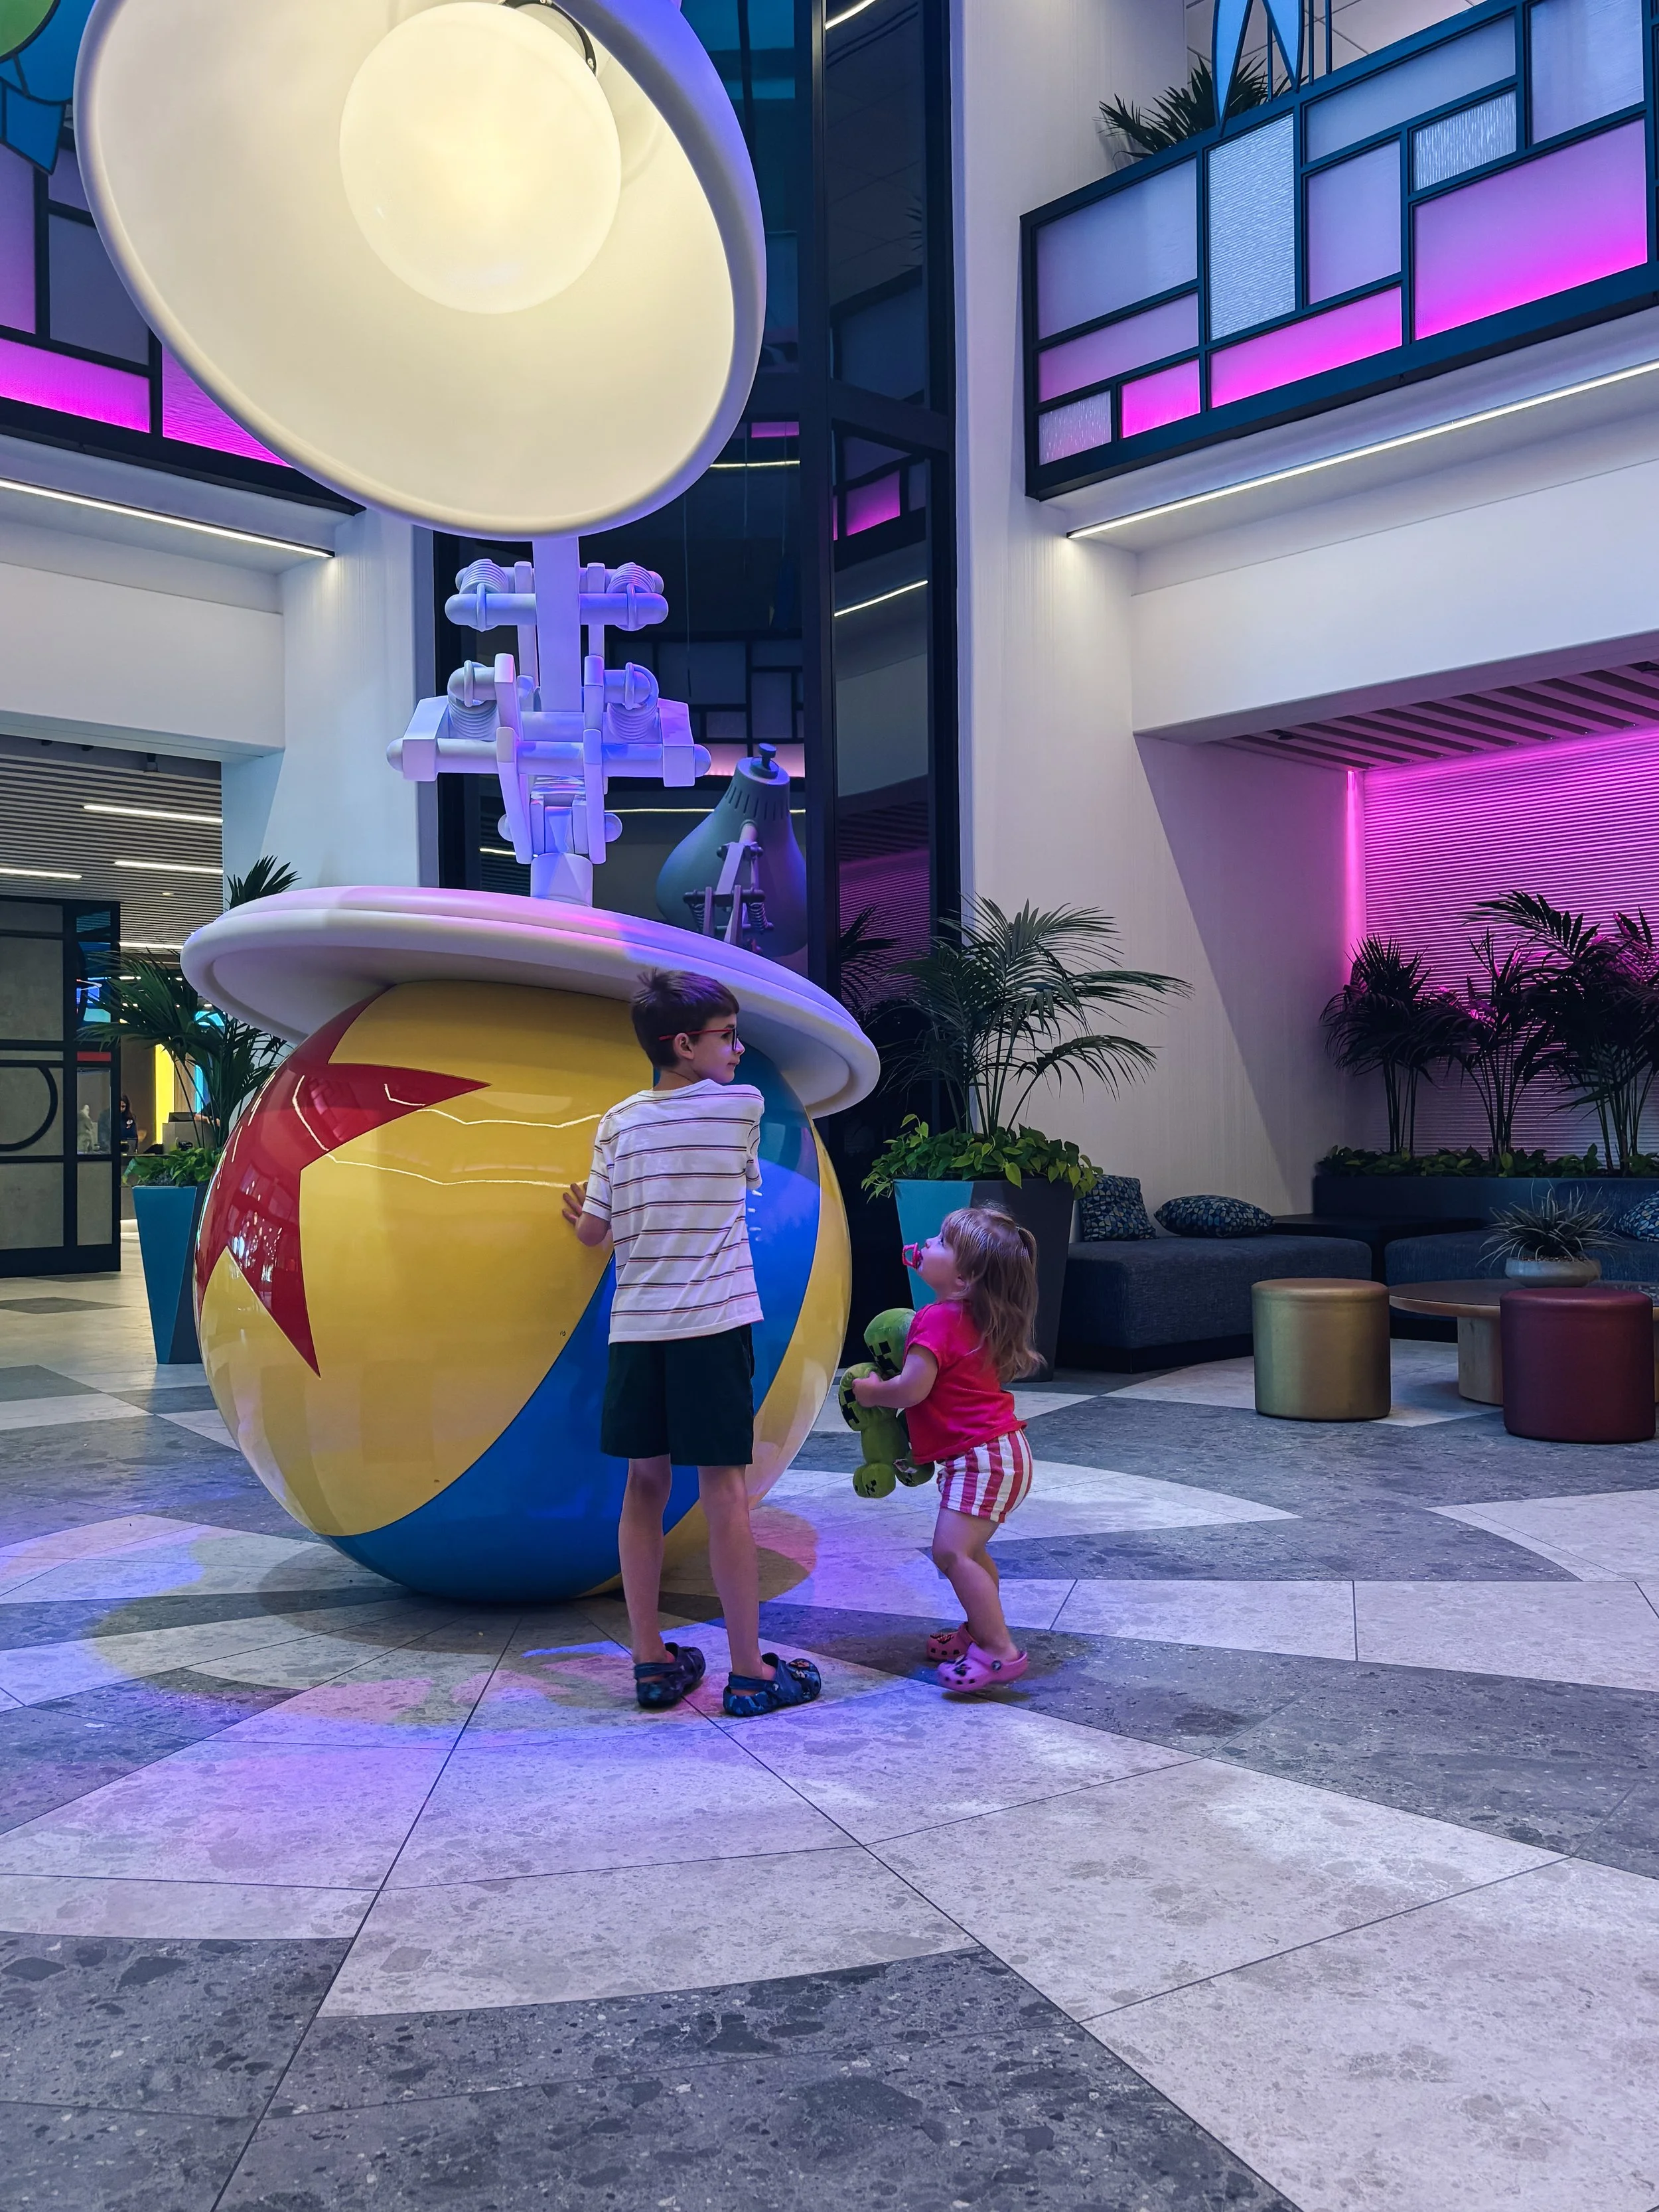
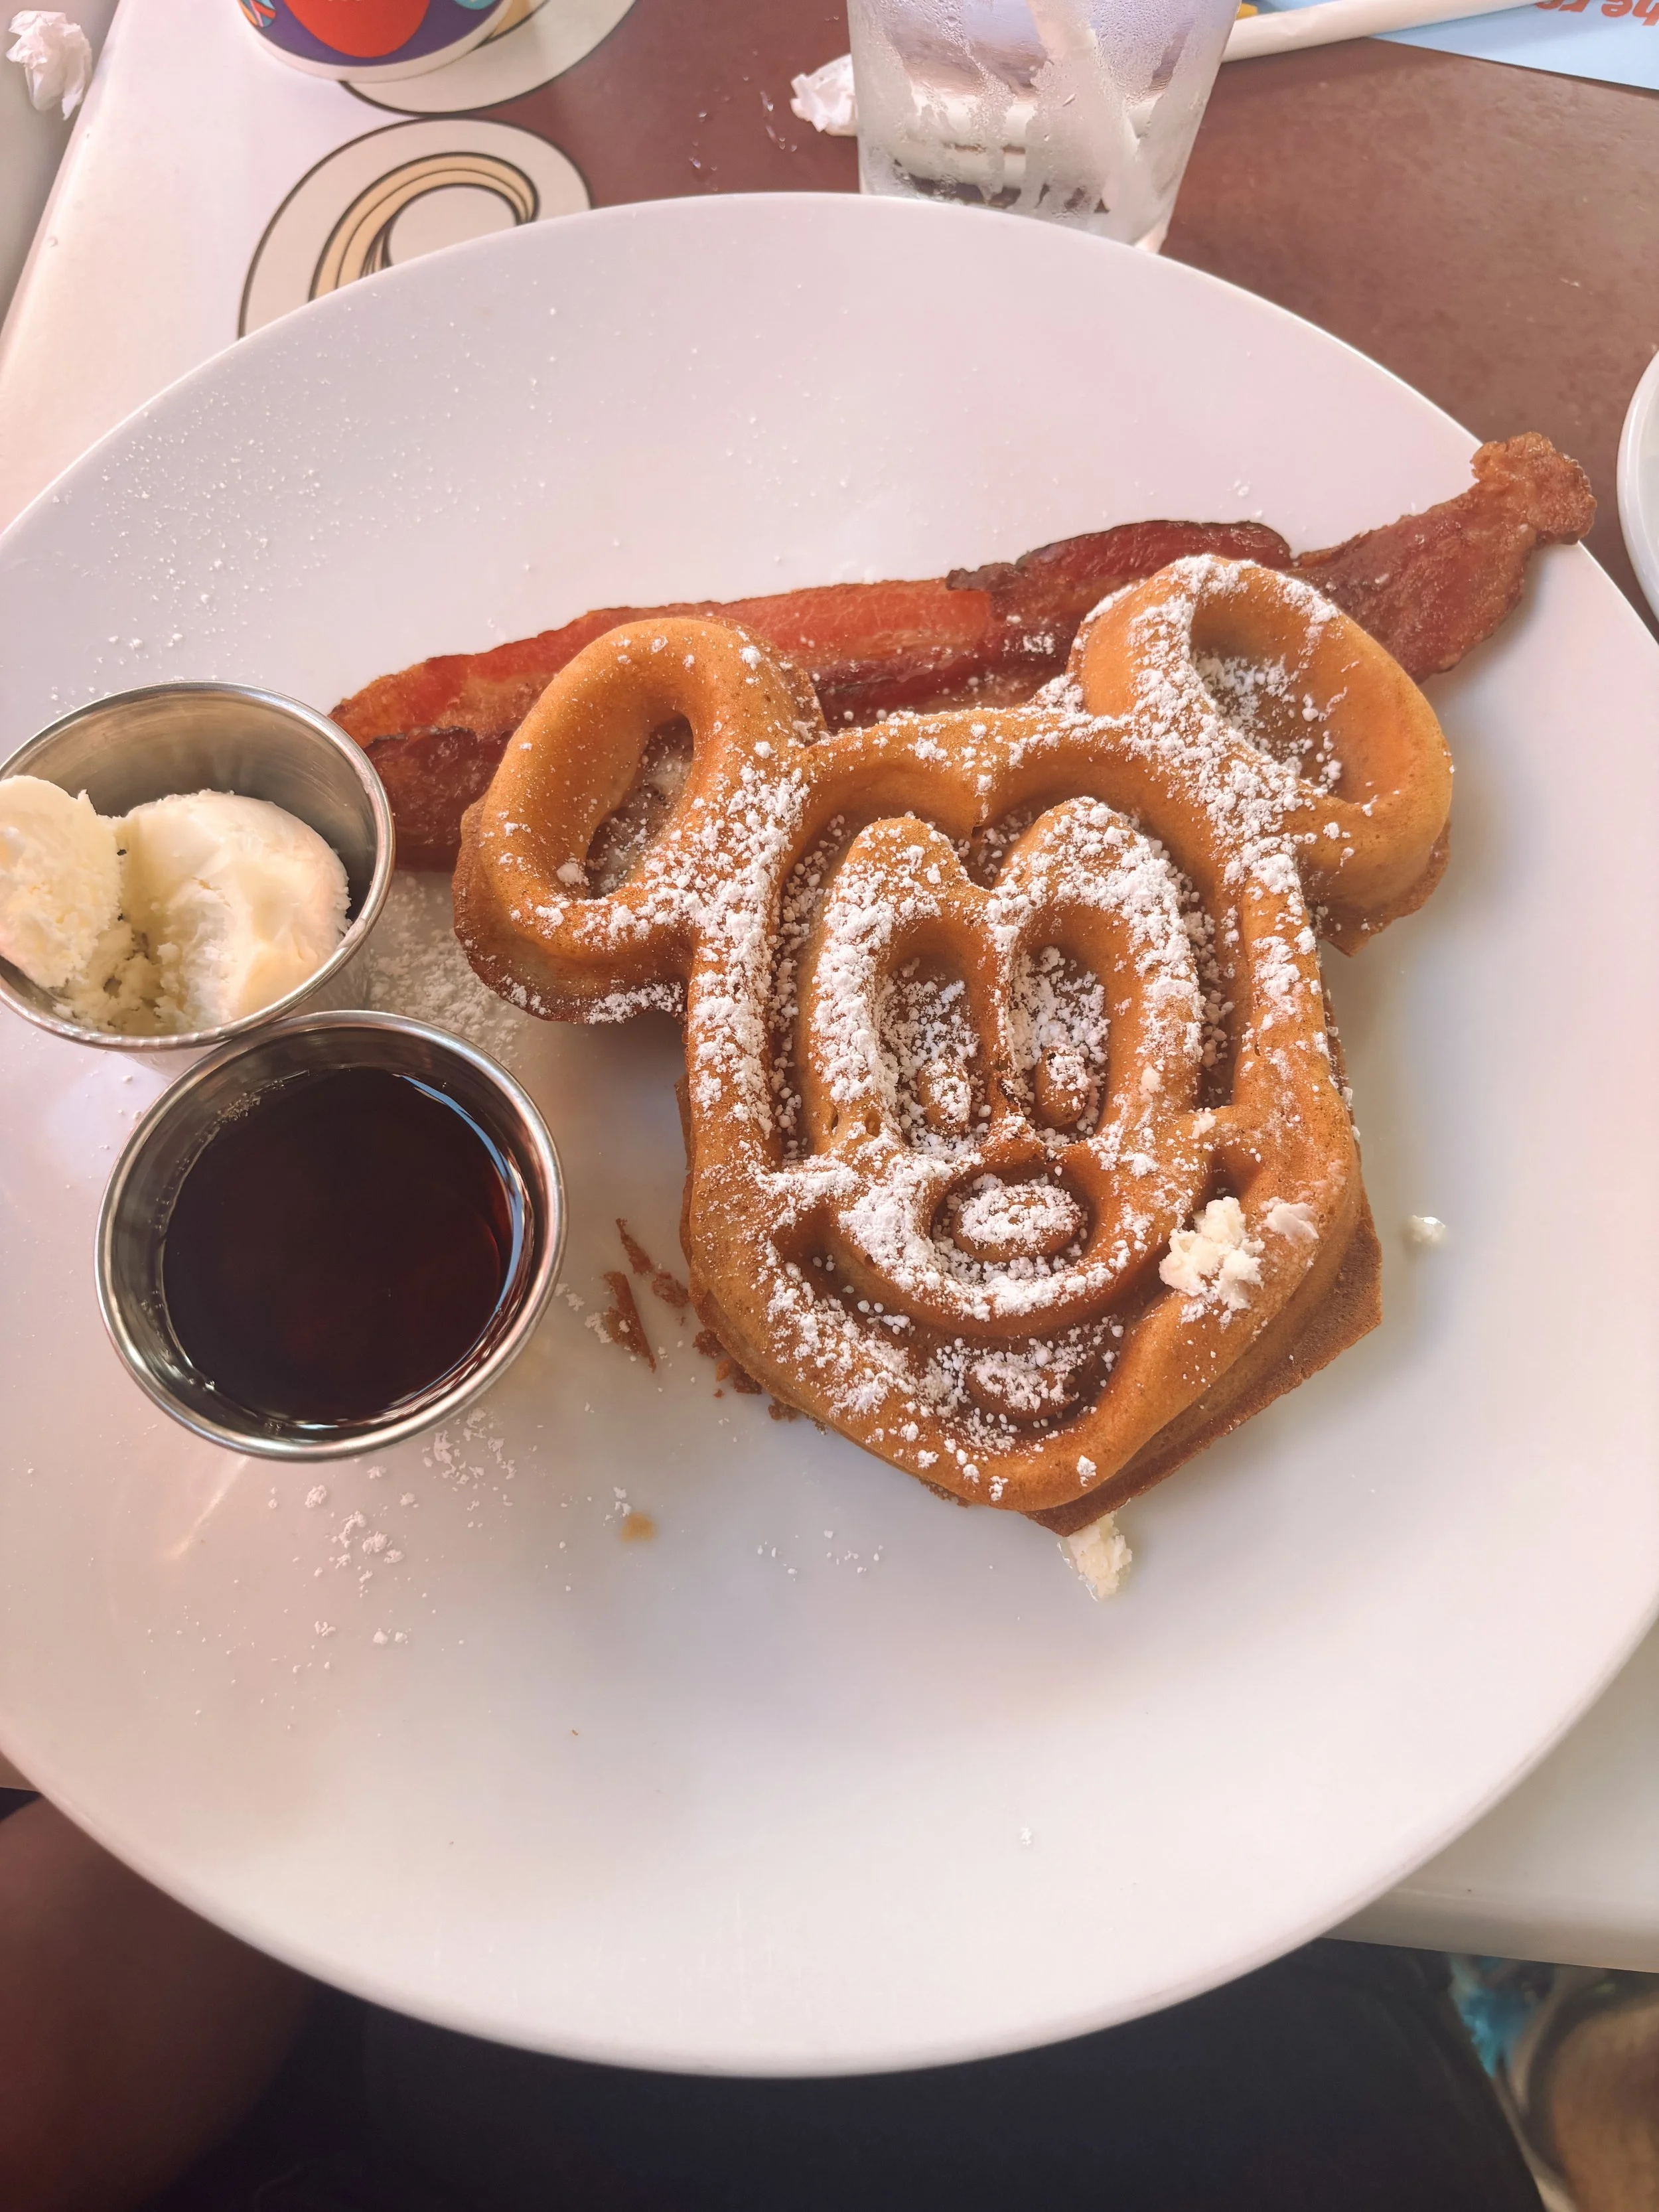
5 Items to Refresh Your Life for Spring

As a full-time autumn and winter girlie, it pains me to say it (but it’s true): by early March, I’m pretty done with winter weather. Here in Oregon, it’s been rain, rain, rain, and, you guessed it, more rain. So much so that my town experienced flooding this past weekend (yikes).

It’s that time of year that makes me want to open every window in my house and throw away every single thing I’ve ever owned. That’s just the vibe, honestly. So it’s no wonder that I decided to redo two rooms in my house: my bedroom and my office. These aren’t the two most high traffic rooms, but they are rooms that become catch alls, which means that when things get busy (like in back to school season, the holiday season, and just-started-a-new-job season), the decluttering tends to take a backseat.

To my great embarrassment, I also have to tell you that in cleaning out the closet in my office (to make space for all the stuff I needed to move in there), I found boxes of notebooks from the job I had from 2014-2019 (why did I keep them?), as well as a completely unopened box of books I bought from Scholastic when Forrest was in pre-k. Not my greatest moment, honestly.

This is all to say: it’s clean out season and that means it’s refresh season. Which means treating ourselves to a few key items to spruce up the house. Here are my top 5 this spring.

A New Rug

Danny and I got rid of our wool rug when we moved into our house—in 2019. So our bedroom has been rug-less for almost 6 years. And not that’s its a necessary thing, but I was getting really tired of our bedroom. This rug is machine-washable and affordable even for the 8x10 size—plus it comes in a few different color ways, all of them really pretty. This has absolutely changed the vibe of our bedroom, lightened it up, and gave it more life. A win-win.

A New Vacuum

I bought a vacuum in 2018 and have been steadfastly using it since. With a large dog, that vacuum absolutely put in the work for a long time. But in the last year, it’s definitely been limping along: there were times where I could tell it was simply not picking up what it used to. I’ve been shopping for vacuums for about 6 months, but couldn’t really decide what I wanted. I ended up going with another Shark; this one is a little more heavy duty and definitely weighs more than my previous vacuum. It works so well that I feel like my floors are finally clean after my poor, weakening vacuum was laid to rest.

Fresh Frames

Since around 2021, I’ve had a mural wall in my office that I love—but I really had started to feel like it was too busy. I’ve had it in my head to start getting prints of my favorite art and so a set of frames became a necessity. This set is so cute and will fit the same vibe as my mural wall—just a little more clean and grown up.

A Fresh Body Scrub

The winter has truly done a number on my hands and feet—and let’s not even discuss what hand foot and mouth disease did. I’ve been moisturizing like crazy and I realized, very suddenly, I need to exfoliate all the winter skin off. Dove body scrubs are really affordable and smell great—and they’ve helped with my hands a lot lately.

A New Bathmat

When we first moved into our house (again in 2019—6 years ago), I couldn’t find an affordable bathmat. I ended up buying these cheap, tiny ones from the College section in Target. And while they work, they’re now falling apart—almost like they were not made to last 6 years of use. The backing crumbles every time I wash them. They’re done! Finished! Through! It was time to say goodbye and upgrade and I’m glad I did. No more crumbly mess after I wash them.


That’s that! 5 items I’ve added to my life lately that have made a huge difference. I’ve been working to make purchases more intentionally for the past 2 years and that often means taking more time to replace something I had to buy out of necessity years ago. What are you loving lately?

I Tried Little Spoon... So You Don't Have To

What feels like ages ago, I tried Little Spoon meals for Violet: we were right in the middle of weaning from breastfeeding and trying to increase the amount she was eating. And like a lot of parents, I worried about her getting the full range of nutrients she needed. At the time, it wasn’t something I was ready to quite commit to: she was picky and cranky about not breastfeeding anymore and the timing was all wrong.

Flash forward to today and our lives are much, much different. Violet attends daycare twice a week and I needed something easy (and allergen friendly!) to pack for her lunches. Finally, I had the opportunity to join Little Spoon again.

This time we signed up for the lunchers option: these are almost like Lunchables, but obviously much healthier. In our first order, we paid $43 and received 8 total lunchers in the varieties of Easy Cheesy Pizza, Chicken Dunkers, and Brunch Lunch.

Here are Violet’s (age 2) unbiased reviews.

Easy Cheesy Pizza

From Violet, this one got an 8/10. From mom, it gets a 7/10, only because Violet is the messiest eater of all time and giving her a sauce cup is a minor disaster waiting to happen. She looooved the Unreal milk chocolate gems (I’m a HUGE Unreal fan as well and love seeing them in Little Spoon products). She ate two of the flatbreads with sauce and cheese, then polished off the cheese and asked for more of the chocolate gems. But alas, she had already eaten them.

Chicken Dunkers

Violet’s rating: 9/10

Mom’s rating: 10/10 (any way I can get more veggies into her is a win)

This Luncher comes with 5 “chicken super nuggets”) (that means they include antibiotic-free chicken, cauliflower, kale, carrots, and chia seeds) alongside probiotic yogurt ranch dressing, pizza-seasoned pretzels, and a brownie that is sweetened with applesauce. All of these are literally fantastic—like so, so good. Please make an adult size, Little Spoon!

Brunch Lunch

Violet’s rating: 10/10

Mom’s rating: 8/10 (Messy!! But cute)

This Luncher comes with a small smoothie bowl, granola, 4 chicken and veggie sausages, and a zucchini muffin. Violet is not quite at coordination levels for a smoothie bowl yet, so I put her smoothie into a cup with a little extra water. I added some yogurt to the granola and she LOVED that. The sausages were a surprise hit because she is pretty hit-and-miss with sausages. And of course, she won’t ever say no to a zucchini muffin.


What’s our final grade for the lunchers? For me, they’re a 9/10 and for Violet, they’re also a 9/10. She LOVES most of the elements of them and I love that she’s getting the fun of a Lunchable without the high sodium or sketchy ingredients (i’m looking at you, pepperoni pizza variety).

If you’d like to try Little Spoon, whether you’re getting purees, first bites, lunchers, or pouches (I’ll be sharing our pouches review soon), you can use my referral code for $20 off your first order.

I Tried Fantastic Fungi... So You Don't Have To*

What is Fantastic Fungi, you ask, reading the title of this post. Well, I’m here to tell you: it’s not as weird as it sounds. Have you ever tried a supplement for sleep? Or for energy?

What if those supplements were made out of something a little more of-the-earth? A little less processed? That’s it. That’s what Fantastic Fungi is.

I was recently approached to review a few of their products and I was happy to say yes. Here’s why: ever since I had Violet, I’ve really struggled with my energy levels. She doesn’t sleep well and I’ve notoriously never slept well, but I need to be able to both sleep soundly (for my energy during the day) and not sleep too soundly (so I can wake up when she does and make sure she’s ok).

My sleep issues have contributed to my lack of energy and a loss of focus in the last 2 years. So I knew when I was selecting products to review, I wanted to focus on those pieces: energy, focus, memory.

Mind Capsules

A 60-day supply of these mind capsules costs $40, which isn’t bad for a supplement. They feature Lion’s Mane mushrooms, which if you’ve ever listened to a podcast, you’ve heard of them. These capsules promise to “support focus, memory and concentration”, thanks to “100% organic Lion's Mane fruiting body extract.”

I took these fairly religiously for 3 weeks before writing this review. In those weeks, I definitely did feel an improvement to my ability to focus. But just for the sake of science, Oregon did also have a week of incredibly good weather in there—which I can’t deny definitely also helped as well.

With supplements, it’s always hard to definitively say “this helped!” but I can say it did not hurt me. No stomach issues, no grogginess or gross feelings. Just an easy daily supplement.

Rise & Shine Bundle

The second product I got to try was the Rise & Shine Bundle, featuring 3 liquid elixirs. This includes Mindful (“made from organic Lion's Mane mushroom, Bacopa, and Gingko to help you stay centered and alert”), Gratitude (“combines 8 of nature’s most potent functional mushrooms — Lion’s Mane, Turkey Tail, Chaga, Tremella, Red Reishi, Cordyceps, Maitake, and Shiitake — to transform your well-being”), and Energy (“combines organic Cordyceps and Turkey Tail mushroom extracts with Chinese Red Ginseng and Rhodiola Rosea to power your day the natural way”).

First things first, they taste good. That did worry me at first—would they taste like pure mushroom? But they don’t, I promise, and they’re easy to take throughout the day. I took Energy in the morning, Mindful at that 3pm energy dip, and then Gratitude in the evening. All 3 were great and I did find they helped maintain my energy throughout the day—and Gratitude definitely helped for relaxation in the evening.

The pack of 3 is currently on sale for $67.50, but you can also purchase them individually.

Lion's Mane Rescue Balm

The last product I received for review was the Lion’s Mane Rescue Balm, which sells for $30 for a 2 ounce tub. While that seems substantial, I do have to tell you: this is my favorite thing that I got. My hands have been dry from the winter and I’ve struggled to find something to help with my super dry cuticles and knuckles. This. Balm. Did. The. Job. I loved it!

The balm is a mix of Lion’s Mane extract, olive oil, beeswax, jojoba oil, vitamin E, and lemongrass for scent. It smells so good and works perfectly if you have super dry skin. I also used this on some rough spots on my ankle—a holdover from when I had hand food and mouth disease in August—and they were gone the next day. It’s a miracle worker. If you choose to get anything from this review… let it be this balm.


What’s my final conclusion? Ultimately, it’s up to you: are you looking for a natural supplement to try before you take more harsh measures for your energy, sleep, or focus? It might be worth trying something from Fantastic Fungi first—you never know what might work for you?


Disclaimer: As denoted by the asterisk (*) in the title of this post, I received products free in exchange for review. Posts like this help me keep the lights on here at Writing Between Pauses. You can learn more about my disclosure policy here.

Everything I Made This Weekend: January 26, 2025

weekend meal prep january 2025

Well, well, well. Another week, another food prep. I look forward to the weekend because I genuinely love meal prepping… it’s one thing that I do to really make our lives easier each week and it never fails to actually do that. My goal is always to prepare a few breakfast and lunch items, a sweet treat, and then anything that we can use for snacks.

This week, I also wanted to share what I bought for our groceries—obviously, I won’t be listing everything, but the big pieces that help. I am on a freezer food buying ban currently (I wrote about my goal to clean out our freezers on my newsletter this week), but that won’t stop me from stocking up on stuff, you know.

Everything I Bought

Danny got paid Friday which means I got both our usual weekly grocery delivery and went to Costco. I had originally planned to go to Costco in person on Friday morning, but the timing did not work out (Forrest had a half day and I had several important things to do in that 4 hour span of time). Instead, I got an Instacart delivery, which yes, I know is more expensive, but damn, it’s convenient.

Here are the biggies I purchased that will help us throughout the week:

From Walmart:

  • Salmon (Alaskan, never Atlantic)

  • Canned pineapple (for Hawaiian chicken this week)

  • 2 bags of potatoes

  • Meatballs

  • Egg noodles

  • Enchilada sauce (enchiladas are an easy staple for us)

From Costco:

  • Rotisserie chicken (obviously)

  • Eggs (yes, I was blessed by the egg gods and my Costco had eggs!)

  • Brussels sprouts

  • Spring mix

I did also visit our community sharing program this week (it’s a food bank!) and I got:

  • Some cans of beans

  • Chicken thighs

  • A ham

  • Fish fingers

  • 5 avocados

  • A bunch of older bananas

  • Apples

I utilize food banks because 1) the more people who use the programs, the more funding those programs will get and 2) the income requirements for food banks are much, much higher than you would ever suspect. For example, the income limit for a family of 4 to use the community sharing is just a little under $8,000 a month. That’s… a lot. That’s nearly every single family of 4 I know. So if you’re reading this and stressing about grocery prices, go ahead and visit that food bank. I promise it’s not as scary as you think it is.


Alright, those are the basics I bought and received this week. Let’s get to the good stuff: what I made!

Breakfast Burritos

Danny is a breakfast burrito fan. Last week, I made him both sandwiches and burritos and while he likes both, I knew he preferred the burritos. (He bragged about them to his students. That’s a compliment.)

This week, I made a quick guacamole with some avocados I had plus the leftover tomatilla salsa I made two weeks ago. I had about 2 tablespoons left in one container and wanted to get it cleaned out, so it was quick and easy to add avocado, lime juice, and some red onion.

For the rest of the burrito, I partially cooked a potato in the microwave, chopped it up, and then crisped it in ghee before adding a few leftover bell peppers diced up. Then I scrambled the eggs. I cooked the bacon in our toaster oven and added 1 slice to each burrito, followed by the egg and potato, some cheese, and a healthy amount of the guacamole. Wrap up and repeat. I made 5 burritos in total for Danny to have this week, which means he won’t be secretly stopping at a fast food place for a breakfast sandwich.

Rice & Chicken Fried Rice

As I mentioned, I got a rotisserie chicken from Costco. This is an every-other-week purchase for us: we love rotisserie chicken and I try to use all of them. However, I have a TON of chicken stock saved up, so I knew I wouldn’t make chicken stock this week.

After I shredded as much meat as possible off the chicken, I decided to make Danny some chicken fried rice. I had already planned to pre-cook some rice for lunches and dinners throughout the week, so it was easy to make fried rice.

I sautéed some frozen veggies (peas, carrots, and corn) then added some of the shredded chicken, before adding 4 eggs and scrambling them up. I added about 1 1/2 cups of the rice I had cooked, then about 3 tablespoons of soy sauce, a splash of rice vinegar, and a drizzle of sesame oil. Once it was mixed up and looking good, I divided it into 3 containers for 3 lunches this week. Super easy.

Miscellaneous

I always have a few bits-and-pieces that aren’t full blown things I’m cooking or baking that I make each weekend. Here they are this week.

  • Boiled eggs: Violet and I are both big boiled egg fans. She often eats 2 of them a day (breakfast and lunch or sometimes lunch and snack) and i often each 1 a day. So we go through a lot of eggs in our house (hence the constant hunt for eggs). I boiled 6 eggs for this week, which I’ll try to make last until at least Wednesday or Thursday.

  • Rice: as I mentioned, I pre-cooked some rice for the week. I use a rice cooker and made 2 cups of rice. I always just use water with a small amount of butter, garlic, and soy sauce for a little flavor. It turns out perfect every time. Highly recommend a rice cooker in your home!

  • Pre-washing fruit: I have oranges and apples for snacks this week, plus some strawberries and blueberries. I like to get berries pre-washed and doused with a little bit of watered down vinegar to keep them from going bad in .5 seconds. This way breakfast for Violet is as easy as peeling a boiled egg and plopping some berries on her plate (this is her favorite breakfast—even better if there is a banana bread muffin there too).

  • Pre-mashing banana: As i mentioned, I got a bunch of bananas from community sharing and they aren’t… the best bananas. They are bruised and a little rough looking, but that’s ok: we’re a banana bread household. I peeled and mashed all the bananas to freeze in 1 cup increments for future banana breads. Doing stuff like this is so, so simple and makes me feel so accomplished. Who would have thought I would ever get excited about having mashed banana in my fridge?


Banana muffins

I know: I mentioned banana bread too many times for this to be a surprise. But yes, I made banana muffins. This weekends meal prep has been a little lighter than usual, but I knew I needed to make some muffins. They’re a great quick breakfast and snack; they are easily carried along in the car; Violet can eat them independently; they’re a sweet treat without being a flat out dessert… banana bread is just the perfect vehicle for getting kids to eat something healthy.

As always, I use the most simple recipe from Better Homes & Gardens recipe collection (I have that classic red-white-and-blue book).

Violet loves these so much, they’re often the first phrase out of her mouth in the morning. “Banana bread muffin?” she will ask, blearily, as I’m bumping into her room because it’s 4:30am on average.


And friends, that is that. It was a lighter meal prep this week. Don’t forget to subscribe to my newsletter for more food writing, general musings, and more.

Lazy Sunday: Everything I Made This Weekend

I originally sent this out as a Substack newsletter, but I’ll be moving these posts here for now.

Oh, hey, look who it is! It’s me, writing for once!

Happy Sunday after the first full week of 2025. Let me tell you—it was a bit of a doozy for me. I don’t want to get too into it, but for the sake of transparency: in this first full week of January I started AND quit a new job.

Honestly, that’s pretty impressive. Again, don’t want to get too into it, but I was mislead into accepting the job—which I think was purposeful, as I was the 4th hire for this role in the span of a year.

After a lot of thought and discussion about the last year, Danny and I came to the conclusion that I will aim for part-time employment. In a post-COVID world that has had a serious backlash to the working conditions that came during lockdown, life has gotten way, way harder for mothers in the workforce. It’s near impossible to find a flexible role anymore: the amount I’ve had to argue about my children in the past 2 1/2 years has been astronomical. I just don’t think school pick up is the end of the world—after all, I work in marketing. I’m not a doctor. No matter how much someone feels like something is an emergency, it’s not an emergency. It’s never that serious.

There are a lot of things I’m willing to compromise on when it comes to working. But I’m not willing to compromise on my kids and I’m not willing to overschedule my life in order to work at a “butts-in-seats” kind of place.

This is all to say: 2025, what a year already!

So anyway, I’m settling into being a partial stay-at-home mom for the time being. I have some freelance work and a part-time gig already lined up, but I’ve decided the next year is about healing for me.

Ok, that’s the general life update. Let’s discuss why we’re here today: cooking.

It’s been one of my goals for 2025 to make more things homemade, to do more food prep to make our lives easier, and to get back to cooking and baking, one of my favorite hobbies. A lot of this is a money saving endeavor (groceries are… expensive?), but I also just enjoy cooking and baking on the weekend. I haven’t really done it for the past several…. years (?) because, let’s be honest, I’m tired. I’m really tired.

So here’s everything I made this weekend.

Rotisserie Chicken - a Classic

If you go to Costco and don’t get a rotisserie chicken, what are you doing? Full disclosure, I had to Instacart my Costco stuff this weekend—I’ve had a cough for about 2 months now and I really don’t want to get sick again—so my rotisserie chicken was at the mercy of Dylan. While Dylan struggled to identify eggs, he did pick a good rotisserie chicken.

I shredded the rotisserie chicken into roughly 2 cup portions (I got about 3 containers) to use in lunches and dinners throughout this week. Then, I did my usual: make chicken stock with the leftovers.

If you haven’t make chicken stock, it can seem really daunting. I just use my crockpot.

Here are the simple instructions:

  • In your crockpot, place your rotisserie chicken carcass. (As a note, you can also do this with any bone-in chicken leftovers—like if you make a half-chicken or a quarter piece).

  • I usually add 2-3 carrots, just cut into large pieces, and whatever amount of onion I had. This time, I had a leftover half onion that I didn’t want to go bad, so I chopped it roughly and tossed it in.

  • I add 1 tablespoon of kosher salt, 1 tablespoon of pepper, and 3-4 cloves of garlic as well. This time I did add some fresh ginger I needed to use up.

  • Then, you add water to cover the chicken, or as close as you can if it’s a big chicken.

  • I set my crockpot to low for about 10-12 hours. It will smell incredible all day.

I’m currently learning how to can chicken stock, but you can also just freeze it when it’s done.

Speaking of when it’s done, you’ll want to let it cook before you strain out all the physical pieces. I usually double strain through a mesh strainer and then portion it out.

Included here: I cooked up a pound of ground beef I’d defrosted in my fridge; I’ll either use it for a dinner this week or freeze it. I often like to batch cook several pounds of ground beef at once to have ready for weeknight dinners…but I didn’t quite plan that far ahead. Maybe next week.

Roasted Tomatillo Salsa

I got a bag of tomatillos this week, so I knew I needed to make some salsa as they were already looking rough. Plus, I had some jalopenos leftover from making a dupe of Chipotle’s corn salsa last week. (If anyone would like a round up of what I made to make Chipotle bowls, let me know!)

Tomatillo salsa is the easiest salsa to make. Here’s what I did. (You might notice all my measurements are general and approximate. It’s your salsa. Do whatever you want.)

  • Peel your tomatillos and rinse well.

  • On a baking sheet, place tomatillos along with a chopped white onion (can be rough chopped!) and 1-2 jalopenos. I personally cut the jalopeno I used in half and removed about 75% of the seeds.

  • Add oil to baking sheet and toss, then salt and pepper.

  • Roast at 350 degrees for about 25-30 minutes, until everything is soft. Take out of the oven and let cool.

  • Once cool, add to a blender with the juice of 1 lime and about 1/4-1/2 cup of water. Blend.

I separated into two small containers. I’ll use one container for enchiladas this week and the other to make some tomatillo ranch soon.

Cranberry Sauce

Cranberry sauce, in January? In my world, yes, because I kind of use it as jam.

I got a bag of cranberries this past week (for free, just like the tomatillos) so I decided to make some cranberry sauce. I follow a really general recipe for it, but cranberry sauce is painfully easy to make. You can really do whatever you want.

I used:

  • 1 bag of cranberries (16oz)

  • 1/2 cup of water plus 1/2 cup of orange juice

  • The zest of 1 orange

  • 1/2 cup of sugar.

Combine everything in a sauce pan and bring to a boil. Boil for about 10-15 minutes, stirring and breaking up the cranberries. When it was thick and most of the cranberries had burst, I let it cool, then blended it a little with my immersion blender. This made about 2 cups of cranberry sauce, so I froze half and kept the other in my fridge. Perfect for sandwiches this week.

Banana Bread Muffins

I had some decrepit looking bananas that needed to GOOOOO so it was banana bread time. Typically, I like to bake a loaf of banana bread, but this time I baked muffins so I’d have individual portions. I follow a super basic recipe from Better Homes & Gardens cookbook; it’s this one here. I do usually omit the lemon zest (because I very rarely have it) and add mini chocolate chips and flax seed instead of nuts.

These are great for a quick breakfast on busy days or a snack for Violet. I also like to pack them in Forrest’s lunch throughout the week. He’s notoriously a picky eater, but he’ll always eat a banana muffin.

What’s Left from Last Week?

Last week, here’s everything I made that I still have for this week:

  • Chipotle’s corn salsa

  • Egg, bacon and cheese breakfast sandwiches on pretzel rolls and english muffins

  • Egg, potato, and sausage breakfast burritos

  • Cilantro lime rice

The corn salsa and lime rice will be easy to morph into burrito bowls with rotisserie chicken, and I’ll be able to use them with enchiladas this week. That’s a win-win to me.

And that’s it, folks! Everything I made this weekend to make the week a little bit easier. I might start writing these weekly as a type of round up and I’m hoping to share everything I make for dinner throughout the week. Is this interesting? I don’t know, but it’s what I feel like writing about and I promise I’d write more this year.

Thanks for reading, as always, and let me know what I should add to my weekly meal prep rotation.

How to Prepare for Cold & Flu Season with Kids

To my fellow parents with school age kids or just kids in daycare, I salute you. In a few weeks, we’re going to be fully in the trenches, battling cold after cold after cold… but for now, we can only prepare, fully aware that our kids are highly likely to miss picture day and that we’ll, once again, be on a first name basis with the pediatrician receptionist.

For the past 2 school years, my son has gotten sick after the first three days of school. Picture day has always been on the Tuesday or Thursday the second week of school—and he has been sick in both of those school photos. I told him our goal was to avoid being sick this weekend, but who knows if that will actually happen.

This summer, we’ve also had illness after illness: mystery flu (Violet), hand foot and mouth disease (all of us, but especially me); and the stomach flu. We caught the stomach flu right before our cruise in August and HFDM from that very cruise… so we’ve really been through the ringer. I’m not particularly excited about this coming school year. If the summer was bad… what will the school year be like?

There is comfort in knowing we aren’t alone; many of my son’s friends were also, somehow, sick throughout the summer. My pediatrician’s phone line is always backed up. So it wasn’t just us! It seems like this summer was a rough one for viruses.

Which again, that does not bode well for this cold and flu season.

I like to think I know a thing or two about taking care of kids with colds. But if there is one thing being a parent has taught me it’s that once you think you have a handle on a situation, the universe likes to throw a little pizzazz. Call it karma confetti. Parents with older kids sometimes make the mistake of thinking we know what we’re doing 100% of the time, but the truth is we don’t.

One thing I do know though? How to prepare for cold and flu season.

1. Stock up on essentials now.

This one might seem a little bit basic, but hear me out: many cold and flu seasons I have found myself awakened at 2am by a crying, feverish, sick child, gone to my medicine cabinet, and found an almost empty bottle of ibuprofen. Or a thermometer that isn’t accurate or has stopped working. Or, worst of all, someone is throwing up and there is no Pedialyte in the house. And by the time cold and flu season arrives, there is usually a bit of a shortage on these things.

Two years ago, my son got the flu during the big Tylenol shortage. I had to emergency order multiple bottles from whatever source I could and it was so stressful.

My point is: stock up all the classics now, rather than ordering (and often spending too much) later. Here is what I try to get stocked up on before the end of September:

  • Saltines & oyster crackers

  • Pedialyte (I like the packets as they last longer and you don’t end up with a half used bottle)

  • Ibuprofen & Tylenol

  • Cough drops

  • Immodium

  • Children’s allergy medicine

  • Thermometer (if you need a new one)

  • Tissues

  • Hand sanitizer

  • Laundry sanitizer

  • Extra bedding and towels

  • Tea & honey

2. Talk to your kids about washing their hands.

Kids are, as I’m sure you know, notoriously lax about washing their hands. Well, most of them. There are definitely some kids who are extremely dedicated to a hand washing routine and for that we thank them. But a vast majority of kids simply don’t wash their hands or rush.

My oldest is not a kid who skimps on washing his hands. He was 4 when Covid started in early March 2020 and so washing his hands thoroughly has been part of his life for the majority of it. He also loves a good hand sanitizer; I always refresh the one on his backpack keychain every week and he knows to use it throughout the day. But this hasn’t been a natural thing; I had to talk to him about the importance of hand washing a lot for a long time.

We also had to make it a constant habit: washing our hands before every single meal; washing our hands when we got home from an event; using hand sanitizer in the car after every stop. It just became part of our lives and to help prevent the worst colds, it’s something you just have to do. (This won’t necessarily stop them from ever getting sick, but it does cut down on it.

3. Sign up for flu shots & Covid boosters.

Controversial? No. Kids should get their yearly flu shots and, if they’re old enough, Covid boosters. (I actually haven’t heard yet, as of September 3, 2024, if there is a Covid booster this year; I assume there will be though!) In November 2022, my family got the flu; and yes, I was 5 weeks postpartum and yes, my newborn did get the flu. You know why? We hadn’t gotten a chance to get flu shots yet. My son was so, so sick I thought he might have to be hospitalized and I beat myself up a lot that month about not getting him in to get a flu shot.

Long story short: get your kids flu shots and Covid boosters. I promise it is worth it.

4. Set up a “just got home” routine

This piggy backs off of point 2, but set up a “we just got home” routine with your kids. I keep my son’s on a laminated piece of paper on our fridge and he knows to check off each box. This is what ours looks lie:

  • Wash & sanitize your hands

  • Change into play clothes and put school clothes in hamper

  • Wipe down lunch box

  • Spray backpack (we use Lysol disinfecting spray for fabric)

  • Start homework

  • Read 10-15 minutes

  • Dinner time

It’s not complicated and the more kids do it, the easier it gets. Obviously, for younger kids, they might need a simpler routine and/or to use pictures on a check off sheets. Either way: make the routine simple to follow and impactful for your evening.

5. Prepare for the unexpected

Not to be dramatic, but anything can happen at any time. RSV was extremely bad last year, as was Covid and the flu. My daughter had multiple colds that landed her in the ER with labored breathing and we had Covid for the first time in December 2023. (That’s a small flex on my part!) We didn’t expect those things, as you can imagine.

Like I wrote earlier: every time I think I have a handle on things, something totally unexpected happens. A stomach bug. The flu. A cold that hits right before a big road trip. You know, regular, schmegular stuff for parents of small and elementary age kids. But it never really gets an easier to handle these things: your kids being sick is extremely stressful for a lot of reasons. You might have general anxiety about their health (hello, me too!); you might have to miss work and, given the economy right now, that’s super stressful; you might have to rush them to the ER and if you’re in the US like me, that’s always stressful.

So, to conclude: you can only prepare so much. Know that you might encounter an illness that shocks you—for me, that’s been hand, foot, and mouth disease (I can’t believe that it’s considered “mild”, my fingernails are falling off). Know that you might have to rush to the ER and advocate for your child in a way you didn’t expect. Your kids will miss school and you will worry about them falling behind. But know that at the end of the tunnel, there is spring and once their older than, like, 12, it won’t be quite this bad.

My Printable Packing List for Your Alaskan Cruise

I’ve already shared my top 5 products for an Alaskan cruise, but now it’s time to share the details of packing. What’s worth bringing, what’s not, and how to organize it. I created a simple, printable guide to help you pack for this trip-of-a-lifetime with your kids and/or toddler.

This guide breaks packing down into specific categories, focused on packing for a toddler—but it applies to kids and adults too! I focus on essentials, the diaper bag, and toddler equipment, plus the basics, with an eye on what is and isn’t available on a cruise ship. Click below to download!

If you haven’t already, check out my blog posts on 5 products that helped my packing organization and everything I learned on our Alaskan cruise.

5 Products to Help Organize Your Alaskan Cruise Packing

Packing for myself for a 7-day trip is often a slog. But packing for 3 people (myself, my 22-month-old, and my 8-year-old) is almost torturous. It’s overwhelming and daunting. 

But I’ve found a few things to help me pack for my kids that take the stress out of it—plus a few pieces that I think will help make your Alaskan cruise just a little easier. 


1. Day of the week packing cubes

These packing cubes have the days of the week on them and let me tell you, they make packing for kids so much easier. While I was packing for each kiddo, I just laid these out on the floor and stacked outfits and pajamas on top for each day. It cut down the amount of guesswork and just made my life so much easier. Plus, it makes being on the cruise easier as well; my 8-year-old was able to grab the day he needed and change without digging through a suitcase full of clothes. Win-win. 

2. Wet bags

Wet bags aren’t new, but they are a valuable packing tool. I used wet bags to pack swimsuits and sunscreen; this way the sunscreen was contained in case it burst and I knew to look for the wet bag when digging for swimsuits. Plus, once we were on the boat, I carried one with us in case of an emergency diaper change. 

3. Laundry bags

For years while traveling, I have packed a garbage bag to put our dirty laundry in. Times have changed and I knew I needed something a little more resilient for this trip. Plus, you never want someone to mistake your dirty laundry for garbage. These laundry bags are MASSIVE (like way bigger than I thought!) They come in a two pack. We filled one up entirely on our 7-day trip and I was able to put it into our largest suitcase (which was pretty much empty by that point). It keeps the dirties contained until you can handle them. 

 4. Toddler cutlery 

Toddler cutlery? What’s this doing on the list? Well, as I was packing I kept thinking about if they would have toddler cutlery on the boat. News flash: they don’t. I ordered this set to keep in our stroller and it was truly a lifesaver. Violet is at the age where she wants to do everything herself and trying to wield a too-big fork just wasn’t it. This set is compact and barely takes up any room. Perfect for streamlined packing. 

5. Toddler leash harness 

Last but not least, a toddler leash. I know, I know, this might be controversial. But cruise ships can be CROWDED and toddlers don’t like being contained. I recommend not bringing a baby carrier for your toddler—it was just impractical—and opt for this instead. It is super compact and takes up less space than a baby carrier, and you’ll be able to let your toddler have a little bit of freedom.