sponsored posts

5 Diaper Bag Essentials for New Moms*

5 Diaper Bag Essentials for New Moms | Writing Between Pauses

When I had Forrest, I really did not put a lot of thought into the diaper bag I chose. I remember feeling just a little bit judgmental of the moms who spent hours pouring over what diaper bag to get. I just didn’t get it.

I get it now, I really do.

Diaper bags are a thing of mystery sometimes: they can be cavernous and full of all kinds of debris; or they can be super organized and ready to roll. And both of those can be the same person, depending on the day. I ended up hating the diaper bag I used with Forrest and I told myself if I had a second baby, I would find one I loved.

I was recently approached by Keababies to try out their Explorer Backpack Diaper Bag. It’s a diaper bag that is a backpack shape and, let me tell you, this really is a dream diaper bag. Take it from someone who had a complicated relationship with leaving the house with my baby! Keababies Explorer Backpack Diaper Bag is a perfect diaper bag in my opinion. I thought I’d share my 5 diaper bag essentials, and why, illustrated with this dynamo of a diaper bag!

1. The Perfect Diaper Bag

Keababies Explorer Diaper Bag

I recently got the opportunity to check out the Keababies Explorer Backpack Diaper Bag. It comes in a few different colors, but I picked the classic gray color—it is really cute! That’s really the first thing. I like cute things; I like functional things; it’s great if those two desires can be combined! And they are in this diaper bag.

I love the backpack style because it makes it easy to be on-the-go with babies. The diaper bag I used with Forrest was really bulky and yet, didn’t have enough room for my things as well. The Explorer backpack has plenty of room for all your diaper bag essentials, plus your wallet, cell phone, and keys. My absolute favorite feature is the two straps at the top (you can’t see them in my photo!) that you can use to attach it to your stroller, giving you easy access to everything.

2. The Feeding Basics

Insulated Diaper Bags

I really am a less-is-more kind of girl; I don’t usually carry around a whole lot of stuff. However, when you have a baby, what you need is sort of… a lot at all times. If you’re breastfeeding, it’s a little easier; you just kind of need your boobs.

However, with Forrest, I was pumping and using formula at the same time, so I often needed multiple bottles, even for a short trip. Sometimes it felt like leaving the house was more effort than it was worth! I needed a bottle of breastmilk, plus a bottle of water and packets of formula. However, that’s another great feature of the Explorer Backpack; it is insulated! That means, you can keep your bottles at the temperature you need them. The bottle holder in the front is absolutely perfect; you can carry a bottle for feeding, plus two for pumping if you need it; plus there is room in the same pocket for any accessories you might need, like burp clothes, nipple guards, and more.

3. A Change of Clothes (or 2)

This one is pretty standard: in case of emergency, you need clothes for your little one and maybe yourself. I always kept two changes of clothes in the car for Forrest; not necessarily in our diaper bag, but just available. I also started keeping a change of top for myself in the car—either a plain t-shirt or a sweatshirt depending on the season. This is because when you’re wearing your child, sometimes they will just spit up down your front—so if you have more places to go, you will want to change that top!

To this advice, I suggest buying clothes specifically to keep in your diaper bag or car. Sometimes, I would lose track of Forrest’s clothes for weeks, only to remember I had packed them up as spares. Buying a few plain onesies and a plain pair of sweatpants that you won’t miss is better than packing something you love, only to realize your baby has outgrown it while it’s been in your diaper bag.

4. More Wipes Than You Think You’ll Need

You will see the cute packs of wipes with decorative covers. My sister-in-law gave me the cutest reusable wipes cover. However: it was far too small for any packs of wipes. Besides, you will always need more wipes than you think you need. If you think you’re running low on wipes, you’re already too far gone, you need to buy wipes immediately. The time between “oh, we’re kind of low on wipes” and “I guess I’m rinsing my baby’s butt in the sink” is razor thin. My advice: pack more wipes than you think you will ever humanly need. Two big Costco packs, if you can: one in the diaper bag and a spare in the car. Maybe 2 spares in the car.

Another great feature of the Explorer Backpack: a really roomy main storage compartment. Perfect for those big blocks of wipes and diapers. (For diapers, I recommend having 5-6 with you at all times, depending on the age of your baby! Make sure to double check sizes frequently.) Wipes are good for everything, not just booties: runny noses, sticky hands, spilled milk, spit up, everything. You need lots of wipes.

5. A Changing Pad

Diaper Backpack with Changing Pad Included

Let me tell you: having a changing pad (aka a really small, compact pad that you can fold out to put under your baby while you change their diaper) is one of the best things I can suggest to new parents. In all likelihood, you aren’t ever going to be able to use changing tables in public spaces—most of the time, they are nasty. They’re also super rickety—I never felt comfortable putting Forrest on one, afraid he would roll off.

The best part about the Explorer Diaper Backpack is that in the back pocket, there is a large, fold out changing pad—perfect for those on-the-go changes in bathrooms, the back of your car, airports, wherever. You can easily wipe it clean and put it back. I would estimate the size as about a foot by a foot and a half, which doesn’t sound big, but is; it’s also really padded, which means it’s much more comfortable for your baby.


I hope this helps you get that diaper bag organized for your baby, or soon-to-be baby! I have missed writing about baby stuff and even though I’m not expecting myself (I am the 1%, it feels like!), a ton of my friends are. If you’d like to try the Keababies Explorer Backpack yourself, I highly recommend it; you can use my code pauses2021 at check out.

Disclaimer: as indicated by the asterisk (*) in the title, this blog post is written using a sponsored product. I received the Explorer backpack free in exchange for review. Posts like this help me keep the lights on! As well, links throughout this post are affiliate links and by using them or my code, I will receive a small kickback from Keababies. Posts like this help me keep Writing Between Pauses running! If you’d like to learn more about my disclosure and advertising policy, click here.

I Tried Banish Acne so You Don't Have To*

I Tried Banish Acne So You Don't Have To | Writing Between Pauses

A few weeks ago, Banish approached me about reviewing their line of acne fighting products. I, of course, said yes. I love trying new skincare products, even if it’s not what I write about everyday. And I don’t know about you, but ever since March, my skin has been absolutely out of control. Stress, masks, the fires in September… it felt like my skin was being attacked every day!

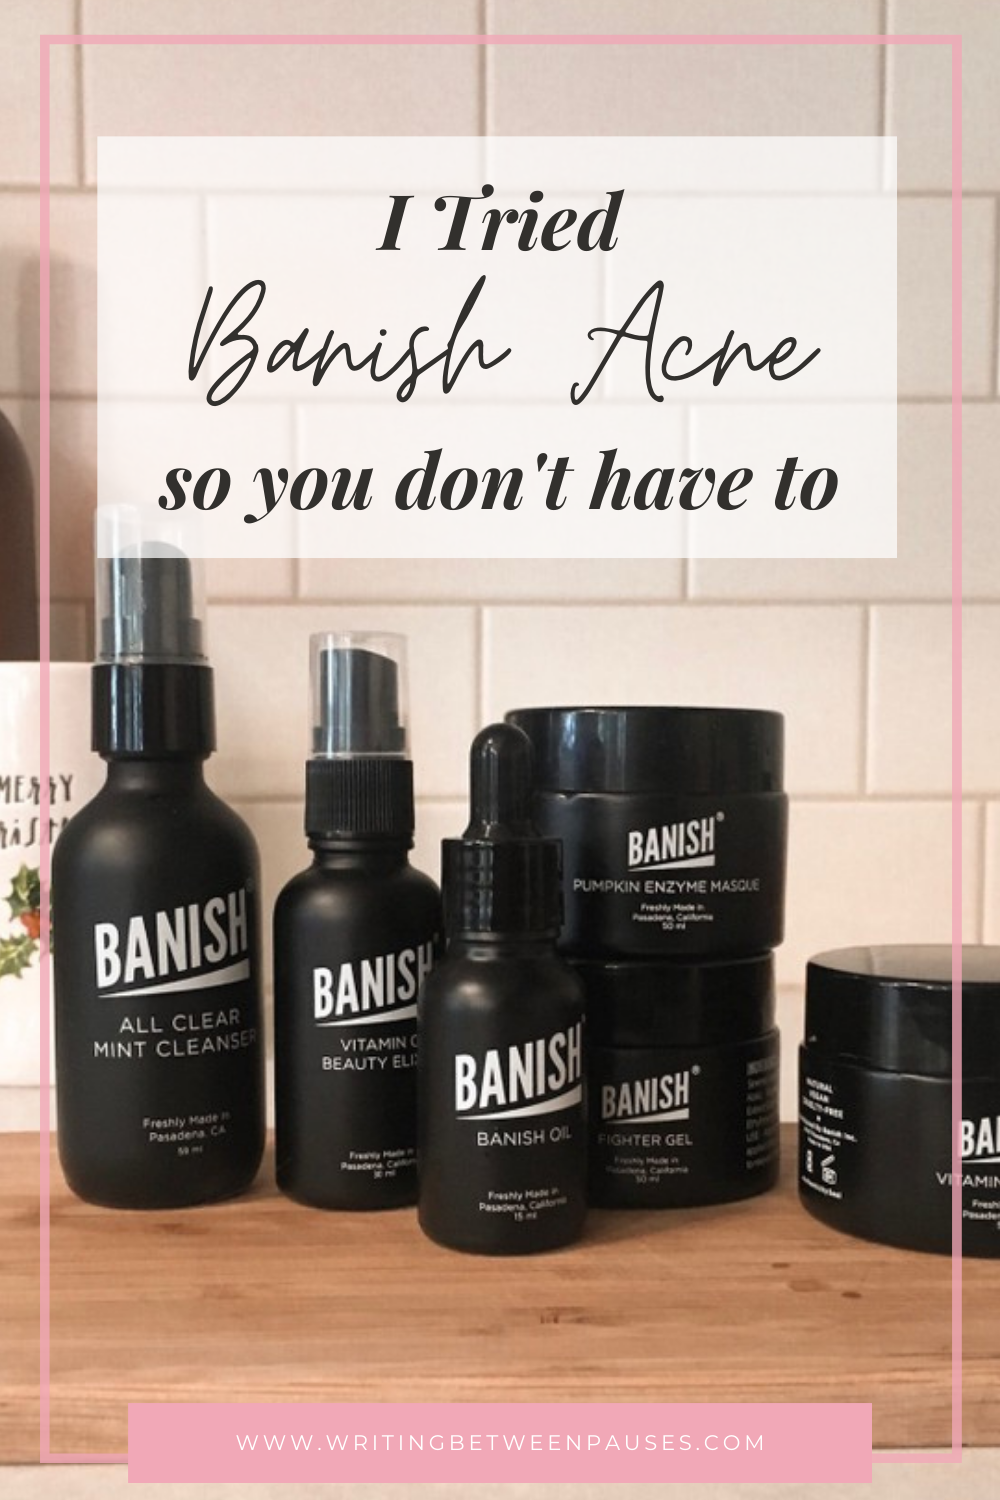
Banish kindly sent me the Banish Starter Kit, plus the All Clear Mint Cleanser. As you might know, I’ve struggled with my skin for most of my life. A few years ago, a combination of going dairy free and using jojoba oil religiously gave me the best skin of my life. However, times change, our bodies changed, and what used to work doesn’t work anymore. Story of my life, am I right?!

Here’s a quick and easy review of the products I received and how I liked them!

The Banish Starter Kit

The Banish Starter kit is one of the best, all-inclusive sets Banish offers. If you’re looking to really rejuvenate your skincare routine, this is the one for you.

Banish focuses primarily on Vitamin C and all natural ingredients to help fight acne, plus reduce the appearance of scars and hyper pigmentation caused by acne.

Here’s what comes in the Starter Kit and what I thought of it:

Banish Oil: this is a vitamin C serum that is intended to help reduce the look of acne scars. I liked this oil, but found that as far as a serum goes, it wasn’t my favorite. It made my skin feel really sticky and grimy. But that being said, I did notice an improvement in my scarring on my chin!

Vitamin C Beauty Elixir: this is a facial mist that gives a boost of Vitamin C and moisture. It’s great for applying throughout the day. I kept this on my desk for days when I felt rundown and in need of a little extra TLC.

The Banisher 2.0: This is a microneedler. I’m not here to tell anyone what to do necessarily, but this is the one product I disliked the most. I don’t believe in microneedling, but mostly just believe that you should leave this to the professionals. I was personally too scared to use this, so I didn’t. However, I know some do love using it! It’s just not for me.

The Pumpkin Enzyme Masque: This was my favorite product. It smells like pumpkin; it makes your skin feel amazing; and it contains AHAs and BHAs that act as natural exfoliators. On the days after I used this mask, my skin definitely felt 100% better and I noticed my redness that I get at the beginning of my cycle was diminished a lot.

Fighter Gel: This gel is a water-based, aloe vera gel that helps calm redness and inflammation, as well as other skin complaints. It smells incredibly mentholated, however, so be careful of that. I did really like this gel! It makes your skin feel very soft and soothed!

Vitamin C Creme: I’m on record as saying Vitamin C all over my face tends to make me break out bad. However, this cream was an exception! It’s 20% vitamin C and is heavy enough for a winter moisturizer. I used it at night and loved how soft it made my skin!

All Clear Mint Cleanser

I love a good cleanser! This cleanser is a gel-based one with chamomile leaf, mint, and vitamin B5—all intended to get your face clean while reducing inflammation. This was really the perfect morning cleanser; really light, but with a smell and feel that is perfect for a wake up call!

Who is Banish best for?

If you’ve had acne most of your life, or cystic acne at any point, you probably have some scarring. I know I do. My chin is a wreck these days thanks to several years of pretty bad cystic acne break outs. Banish is designed to soothe existing break outs and skin conditions, while also fading those scars and areas of hyper pigmentation. If you struggle with any of those issues, Banish is definitely worth a try.

Even better, it’s just nice to be able to get everything in one go: moisturizer, cleanser, etc. It’s nice to have one line up to turn out! Some items are definitely better than others, but overall, I think there is potential for every product to work for somebody who needs it.

Final Thoughts

If you are struggling with your skin’s texture or appearance due to scars, I think this is a line that will work perfect for you. To try Banish, visit their website here. Thank you again to Banish for sending me these products to try!

Disclaimer: As denoted by the asterisk (*) in the title of this post, I received products for free in exchange for a review. However, all opinions remain my own! If you’d like to learn more about my disclosure policy, click here.
3 Cozy Summer Loungewear Pieces for Working from Home Featuring Femme Luxe*

3 Cozy Summer Loungewear Pieces for Working from Home Featuring Femme Luxe* | Writing Between Pauses

It’s been so long since I’ve written and posted anything close to fashion content—including photos. I’m really out of the habit. However, I’ve been on the hunt for the perfect loungewear for wearing around the house while I’m working—pretty much since quarantine started in March. I feel like I’ve ordered more new loungewear and pajama sets than I have in years.

Part of the reason why I’ve been on the hunt for great loungewear is because I want to feel comfortable while I’m working from home, while also wearing things that don’t make me feel super slovenly or gross. I tend to wear my pajama pants (well loved pajama pants! I’ve owned the same 5 pairs since before I was pregnant with Forrest) and t-shirts of Danny’s when I’m home. And frankly, after a few weeks of that, I wasn’t feeling so great.

Loungewear gives you that perfect in-between of “I’m dressed up” but also “I’m super comfortable.” When Femme Luxe reached out to me to showcase a few outfits, I was excited to see so much loungewear available. It isn’t the sort of website I would usually consider placing an order from, but I decided to test it out and see what I thought. I’m really glad I did. Here are the 2 outfits I picked out (comprised of 3 separate pieces!).

The first choice I made was this Gray Oversized Loungewear Set. I love an oversized t-shirt, so that was an easy choice to make. In regards to sizing, I ordered the Large size in this one—the shirt is perfectly oversized. The leggings were a bit small at first, but have stretched out a little overtime. I’m typically a size 12-14 ish in pants and skirts (although it’s super variable), so just keep that in mind if you’re ordering.

Best of all these 2 pieces are comfy and soft. Since it’s a uniform gray-all-over, I feel a little more put together than just in my slubby oversized t-shirt!

One thing to note is that these leggings are a bit see-through in the butt—so if you wear them out, make sure to wear a longer t-shirt (like the matching one!) or a tunic-style top to cover up (if that’s something you worry about! If not, live your life girl!)


The second loungewear set I picked was the Taupe & Black Oversized Hoodie Shorts Loungewear Set. It’s a set of basically sweatpants shorts and a zip up hoodie vest—I picked the olive green color, but it also comes in taupe.

I ordered the XL size in this one and I probably could have ordered a size large. The shorts are a little too big, but that’s fine because they’re so comfortable and soft. I’ve probably worn this set more than any other—it’s so comfortable and perfect for summer, when it’s too hot for leggings, but you want to be comfy.

The hoodie vest is also great for layering—I like having pockets when I’m in my house, only so I always have my phone and glasses. These ones are perfect—they’re super big!

I paired this set with the Coral California Graphic T-shirt. I ordered a size Large in this as well—it fits really well. I’ve worn this t-shirt so much, I’ve washed it 3 times since I got it already! It’s probably my second favorite piece (after the shorts from the loungewear set!) and I’ve gotten a ton of compliments on it. It’s just a cute graphic t-shirt, perfect for wandering around the house, working or just lounging.

My favorite thing about these 2 outfits is that, if I have to jump on a quick Zoom call with a client and don’t want to change my outfit, it doesn’t look like I’m wearing loungewear—I look nice without having to put in a ton of effort!

When I first was approached by Femme Luxe, I was worried that they wouldn’t carry much in my size. Being plus size these days definitely feels a bit restrictive at times—there’s just less for us. But if you’re in the smaller range of plus size, Femme Luxe is a great, affordable option. Even better, they do ship to the United States, so if you, like me, want to try some new loungewear pieces, they will make it across the pond!

Disclaimer: As denoted by the asterisk (*) in this post’s title, I did receive items for free in exchange for posting. Posts like this help me keep the lights on here at Writing Between Pauses. However, all opinions remain my own. If you’d like to learn more about my disclosure policy, click here.

Beauty Review: Prana Dry Brush*

Beauty Review: Prana Dry Brush | Writing Between Pauses

About 7 years ago (yes, 7 years ago), when Google Reader was still alive, I read a blog post from someone I followed about dry brushing. I can’t remember her name, or her blog’s name, but that memory of her raving about dry brushing stuck with me. Whenever I heard it mentioned, I’d think of that blog post and think, maybe I should try that?

But then I never actually did anything about it. I stayed curious about dry brushing, but in the chaos of my life (getting married, buying a house, working on my career, working on this blog, having a baby, successfully raising that baby into a toddler), I never got around to. I mean, I just bought a jade roller, guys. When trends pop up, I try my best to get on the train, but often, I’m running behind the train in two different shoes and my hair in a messy bun.

So when Prana Brush reached out to me about trying their dry brush, I knew I wanted to try it immediately. I jumped on a phone call with Jessica, who told me all the great things about the Prana brush, how it worked, and what it did. And honestly, I was on board. It didn’t take much convincing. I’ve had 7 years to stew on this, I was ready.

What is Dry Brushing?

What is Dry Brushing?

Dry brushing is exactly what it sounds like: you use a brush to gently “brush” your skin, usually moving towards your heart. You do this dry—not with a loofah in the shower, not by dampening the brush. This helps exfoliate your skin and prepare it to be washed in the bath or shower, as well as improving your lymphatic system’s health, minimizing the appearance of cellulite, and helping circulation. There are tons of other benefits to dry brushing too.


The Prana dry brush

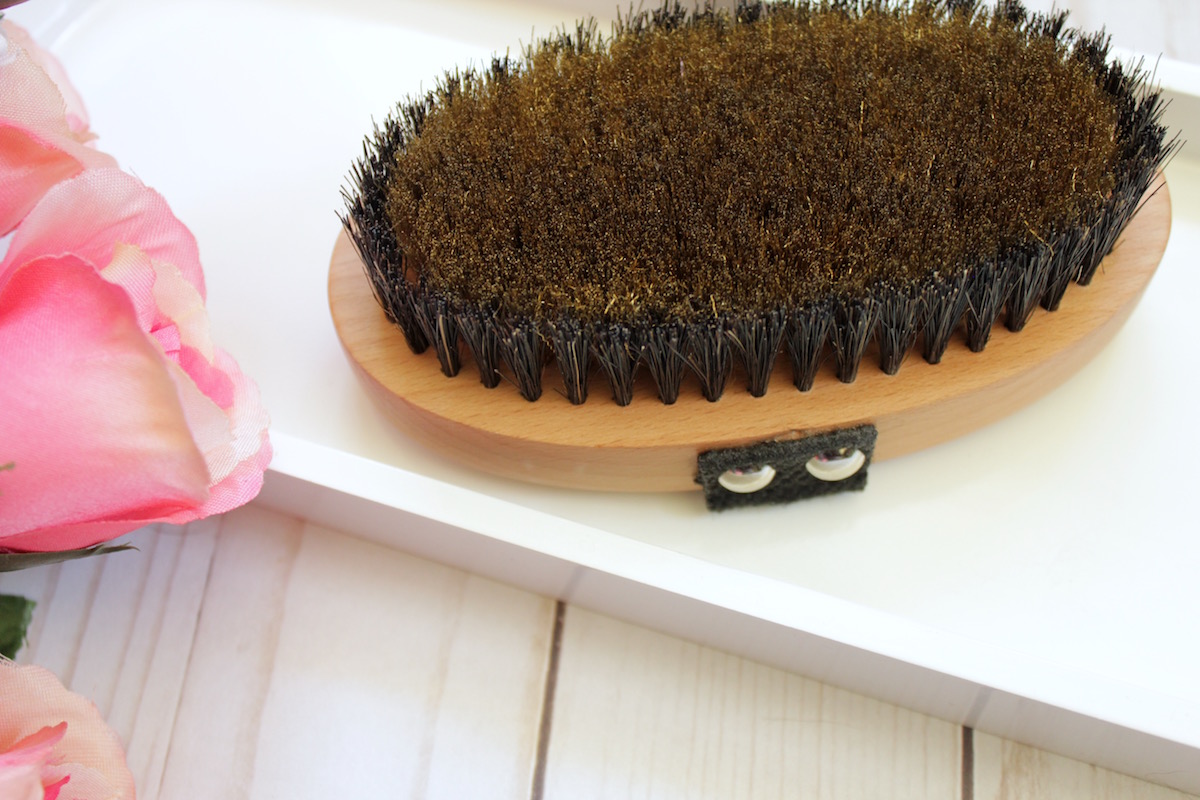
When I first received my Prana dry brush, I was impressed by how well made it was and how soft the bristles felt—while also being seriously exfoliating. I tried it the first time that day before I jumped in the shower. The number one thing to remember about dry brushing is that you aren’t scraping your skin or going hard on this brush; it’s just a gentle motion. I noticed a huge difference in the dry skin I always have on my ankles and elbows almost immediately!

Dry Brush with Copper Bristles

The Prana dry brush is different from other dry brushes because it has ionic copper bristles in it, as well as standard bristles. You can see them in the picture above. I know “ionic copper bristles” sounds incredibly harsh, but I promise you, they’re really not! The ionic copper bristles “create a natural friction between the ion-charged copper bristles and your skin,” which is incredibly good for your skin.

This brush is designed to be used dry, of course, and doesn’t require cleaning. Copper is naturally antibacterial, so there is no need to wash this dry brush as you would a normal brush. After I used it, I just carefully tapped it on the side of my tub to remove any dry skin that it may have picked up. It came in a beautiful cardboard box that I am using to store it on my windowsill (in the chaos of packing, at least).

You can learn more about dry brushing from Prana Brush here.

Final Thoughts

So, was dry brushing worth the 7 year way?

In short, absolutely! I’ve noticed a huge difference in my skin, especially on my legs, which have often been a “problem area” for me. I have strawberry skin, which means my hair follicles are visible. I’ve always decreased this by using self tanner, or wearing tights as much as possible, but I’ve found since starting to dry brush, I’ve noticed a huge difference in how these spots appear! My skin is also smoother and softer, absorbs lotion better (no slick seal feeling when I get into bed!), and doesn’t have any problem dry spots. Since it’s only 2 weeks, I can’t speak on the other benefits of dry brushing, but I’m excited to see how I feel in a month or two. I’ve definitely struggled with my energy levels in the last 3 years (thank you, postpartum depletion!) and so if this helps me get my body back in fighting order, I’d really love it.

Have you ever tried dry brushing? What did you think?

Beauty Review: Birchbox, May 2019*

Beauty Review: Birchbox, May 2019 | Writing Between Pauses

Last month, I shared my first Birchbox to show you what the new, redesigned Birchbox offers. If you didn’t catch that post, you can read it here. However, as a summary, here’s the jist: Birchbox is now $13 a month (depending on the plan, but that’s the average) and doesn’t just come with 5 samples, but at least 5 with a few bonus samples. Last month, I got 7 samples, including a Sunday Riley Luna Oil sample which I am still using a month later. (Such a good deal!)

This month, I’m going to share a more traditional review of Birchbox. If you’d like to sign up with Birchbox, you can do so by clicking here*.

Is Birchbox Worth the new Cost?

Here’s What I Got:

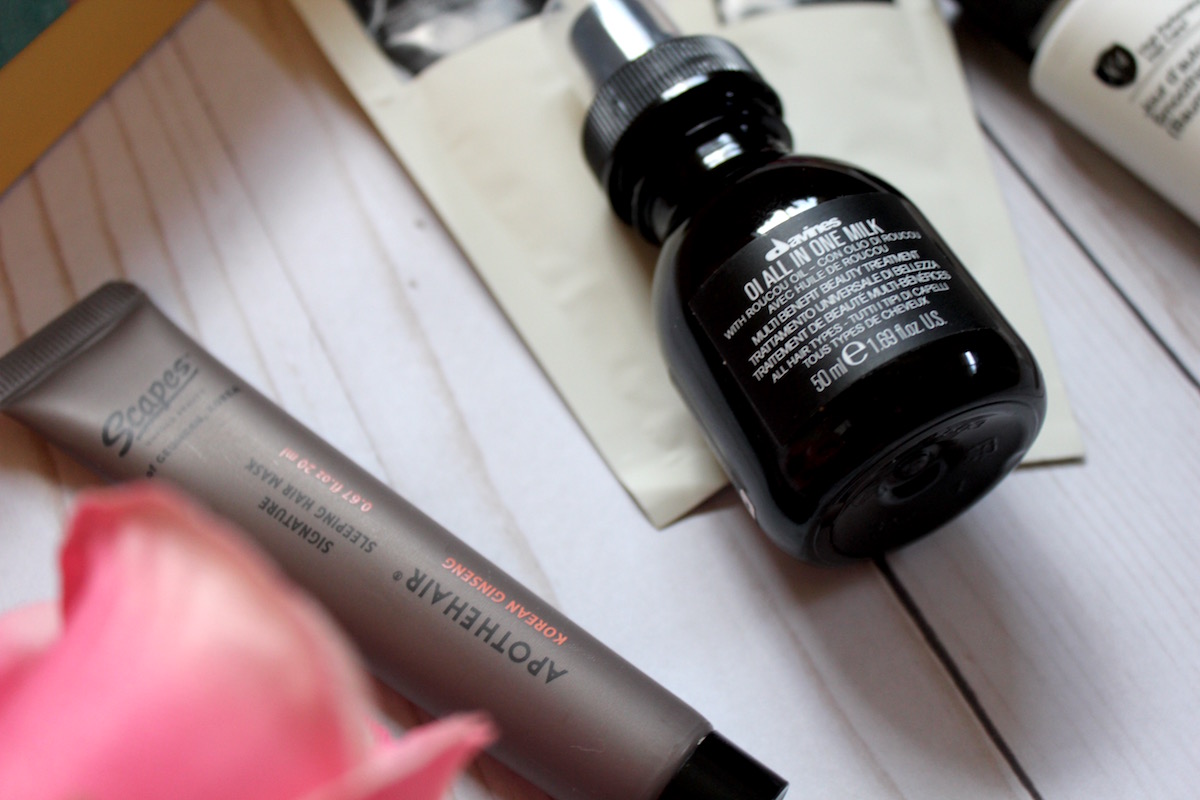
Davines OI All in One Milk (50ml/1.69oz) : “This nourishing leave-in treatment detangles while adding volume, shine, and heat protection.” A full size of this hair milk retails for $34 and contains 4.56 oz/135 ml, making this sample roughly $12.50 in value. It is a fairly large sample. I really like this one, as I can spray it on my hair when it is dry or wet and it helps tame frizziness (especially as it has been humid and rainy here in Oregon). It also smells amazing.

Dr. Lipp Moisturizing Colour Tint in Sweet Potato (3ml): “This high-shine tinted lip balm uses just four natural ingredients… Organic edible sweet potato pigments give it its flattering pink shade.” I actually received a full size of this product from my Ipsy bag several months ago. The full size is only 5ml, making this deluxe sample worth about $5 (the full size is $8.95). I am almost done with my tube from Ipsy, so I guess it’s good I got a second one!

Kiehl’s Ultra Facial Cream (0.25oz/7ml): “This ultrahydrating moisturizer is rich without being greasy and sinks in without leaving behind any residue.” This was my sample pick this month; the samples were pretty lackluster, but I’ve never tried any of Kiehl’s facial products. I quite like this moisturizer, as I’ve been breaking out a lot lately and my skin has been dry, dry, dry (I think it’s from the recent changes in weather here). A full size sample retails for $30 and contains 1.7 oz, which makes this sample worth about $5.60. This cream didn’t make me feel greasy either, which is always a plus!

Marcelle Xtension Plus Skyline Mascara (0.14oz/4.2ml): “This clump-free mascara’s ultraskinny brush helps curl and lift every last lash while adding length and definition for a wide-eyed appearance.” This sample is about a half-size, which is pretty good! A full-size retails for $15, making this about $7.50 in value. Mascara is always a hard one for me, as mascaras often don’t do what I need; I have very long, full eyelashes, but they are quite thin. I’ve yet to find a mascara that adds volume without being clumpy af, and, unfortunately, this one only seems to lengthen. Nice, but not what I need!

Number 4 Jour d’automne Smoothing Balm (1oz/30 ml): “Prep damp hair with this styling cream, which contains tiny molecules that penetrade each strand to minimize frizz, add touchable texture, and protect against heat damage.” This is about 1/5 the size of a full size bottle, which retails for $30, valuing this sample at about $6. This is one of 3 leave-in hair products I received (I’ll touch on this in my final thoughts), but I quite like it still. My hair, as everyone probably knows by now, is very long, very thick (I have a lot of hair), but very fine and straight that tends to get frizzy with fly-aways. This seemed to make a huge difference.

SCAPES Apothehair Signature Sleeping Hair Mask (0.67oz/20ml): “Apply a dime-size amount of this herb- and oil-rich leave-in conditioner to damp hair before bed to wake up to smoother, hydrated hair. No need to rinse out, just style as usual.” A full size of this product retails for $25 and has 125 ml; that values this sample at about $4. Honestly, this is probably my favorite product of everything I got; it smells amazing and made my hair feel absolutely lovely. And $25 for how much you receive is pretty amazing, considering you only need a teeny tiny dollop.

Davines OI Shampoo (0.4oz): Nice, a shampoo packet. This shampoo promises to be ultrahydrating, which is fine. It says it protects hair from UV rays, which I quite appreciate. I did get tons of compliments on my hair after using this, but since I only received a packet (it was just a bonus item), it’s hard for me to know if that’s because of the leave-in conditioner or this shampoo.

Davines OI Conditioner (0.4oz): Another packet! I did quite like this conditioner even if I only received a packet of it. It reminded me a lot of the Shea Moisture Manuka Honey mask that I like to use: a little lighter than that, but very hydrating and rich. It made me hair feel lovely and I almost wish I had saved it to use alongside my preferred shampoo, just to see what it really did for my hair.

What Kind of Samples do You Get in Birchbox?
Kiehl's Ultra Facial Cream
Hair Masks from Birchbox

Final Thoughts

The total retail value of this box is about $44.60. That includes a very generous $2 each for the shampoo and conditioner packets. While $45 would be quite the shocking price for a bunch of sample (and deluxe sample) size products, for $13, I definitely don’t baulk at it.

My one issue, if you couldn’t tell, is that 8 things I received, 5 of them are hair products. And of those 5 hair products, 3 are leave-in products! Thats honestly just a bit too hair-heavy for me, when I tend to be quite picky about my haircare products. While I did like all of them, I found myself frustrated at having to space how when I tried everything; if I used it all at once, how would I know what did what!? It also doesn’t give me a well-rounded amount of things to try, especially as one of the non-hair products I’ve received from another subscription service.

Are you a Birchbox subscriber? What did you receive this month? I actually had wanted one of the curated boxes, but it had sold out by the time I was able to get in to select my item or box for the month!

Disclaimer: As noted by the asterisk (*) in the title of this post, this is a sponsored post with Birchbox. I am a Birchbox affiliate and any links to the Birchbox site are affiliate links and also marked with an asterisk. I received a 6-month Birchbox subscription in exchange for blog posts. Posts like these help me keep Writing Between Pauses going! However, all opinions remain my own. If you’d like to learn more about my disclosure policy, click here.

Beauty Review: Hourglass Vanish Seamless Finish Foundation & Veil Powder*

Beauty Review: Hourglass Vanish Seamless Finish Foundation & Veil Powder | Writing Between Pauses

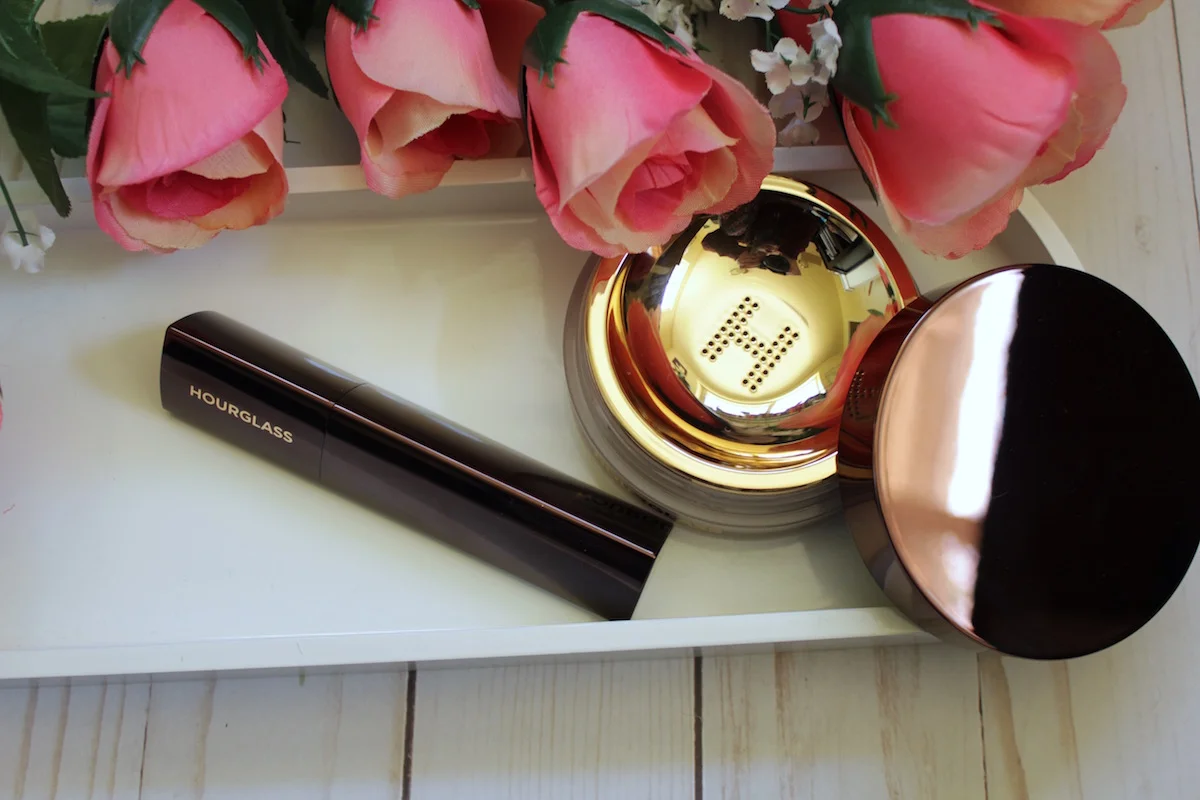
I love a new foundation. Having problem skin (I hate that phrase, but why is it the best way to describe everything?), my base makeup is one I almost always wear, even when I’m running late. Foundation & powder are crucial items for me, so getting the opportunity to review the Hourglass Vanish Seamless Finish Foundation stick (it’s that triangle shaped foundation stick that every beauty guru uses in their videos—seriously) and the Veil Powder is really a dream come true.

Like with all my foundation reviews, I gave myself a few days to experiment with this foundation and how I applied it. Here’s a rundown of each of my wear test methods:

  1. Clean face, moisturizer, foundation blended with kabuki brush, veil powder on top

  2. Clean face, moisturizer, It Cosmetics powder, foundation with brush, veil powder on top

  3. Clean face, moisturizer, foundation with sponge, It Cosmetics powder & veil powder on top

I felt like that gave me the most variety of how I applied it. I’ll share what I think worked and what I think didn’t later.

First, let’s talk about this foundation.

Hourglass Stick Foundation

The Hourglass Vanish Seamless Finish Foundation Stick (phew!) retails for $46 from Sephora. That is a pretty steep price point, especially as you only receive 0.25 ounces! For reference, the average foundation comes with 1 ounce as a standard measurement. However, this foundation has been everywhere. So I expected to be impressed: with a price point like that and so much hype from the beauty world, I found myself very easily swayed.

Here’s what this foundation promises:

A weightless, waterproof foundation with long-wearing, concentrated coverage in a custom, triangular component for fast and easy full coverage on-the-go. This long-wearing, waterproof formula provides up to 12 hours of coverage, contains double the amount of pigment versus traditional foundations, and adjusts to your body temperature to effortlessly blend into the skin. Multiple shades can also be used to contour and highlight.

I knew from the get-go that this promised to be a full-coverage foundation. From the videos I’ve watched, it definitely seemed to cover everything. But as we know, a lot of YouTube beauty gurus use blurring filters, which can make their skin look a lot better.

I received the shade Alabaster, which promises to be fair, with a cool undertone. As with most foundations, I found this to be a lie; it swatched very yellow/orange on my forearm, which made me pretty nervous from the start.

My first application, however, I felt like it matched my skin tone pretty well. My first wear test, I used a brush to apply it, as I’ve found in the past that stick foundations work best with a brush. However, I did feel like the brush left my foundation looking pretty streaky.

How Good is Hourglass Stick Foundation

Let’s discuss the powder for a minute as well. The Veil Translucent Setting Powder also retails for $46 for 0.36 ounce (so about 1/3 of an ounce). Comparatively, the It Cosmetics Bye Bye Pores powder (my favorite powder, review here) is $30 for 0.23 ounce (about 1/4 an ounce). So that’s a pretty standard size, but still pretty steep in price. Here’s what the powder promises:

The magic of Veil transformed into an ultra-refined loose powder designed to give skin a naturally flawless finish. This finely-milled, weightless powder is formulated with soft-focus light-reflecting particles to instantly blur imperfections and minimize the appearance of pores, fine lines and wrinkles for effortlessly smooth skin. The translucent formula can be used on all skin tones for an invisible, natural skin finish.

You know I love a powder and I immediately loved the texture of this powder. It felt so heavenly when I swatched it; it’s so finely milled and soft. I don’t know how else to describe it. I was so excited to use it.

Hourglass Foundation Wear Test

The first day I wore this foundation, as I said, I applied it with a brush, then applied the powder. I didn’t use my usual It Cosmetics Bye Bye pores powder. (I already linked the review, but this powder really is my holy grail. I always go back to it. It’s that good.) Within a few hours, my nose was almost entirely bare of foundation, which is pretty standard if I don’t use my It Cosmetics Bye Bye Pores. So, strike 1 for the Veil powder. However, on other areas of my face, the foundation had held up well. Despite the streakiness, I did really like the finish and even though I had been hesitant about the color, it didn’t oxidize or anything. It is not a matte finish, as it is a cream formula, and it is very full coverage without feeling heavy. I didn’t notice it getting cakey or gross, but it did slide around—again, probably because I didn’t use my holy grail powder.

On second wear test, I decided to try my tried-and-true method of using It Cosmetics Bye Bye Pores as a base underneath my foundation. (This is the Wayne Goss method; if you’re oily-skinned, I highly recommend it!) However, this made it slightly harder to blend the foundation; I found it dried before I could get to brush it. It became a bit of a mess. However, once I applied the Veil powder over top, I had salvaged it a little bit. And honestly, I love the finish of this foundation combined with the Veil powder. The Veil powder really is beautiful on the skin. However, even with this method, I found it broke down, especially around my nose, within 3-4 hours.

For my third wear test, I think I found the best method: clean face, moisturized, then apply foundation with a sponge. Even though I usually apply cream foundations with brushes, something about this stick foundation definitely did not play nice with my brush! It looked great with a sponge and just as full coverage. I found I did not have to use any concealer with this application, as my undereyes and blemishes were covered. Then, I mixed the Veil powder with a little bit of my It Cosmetics Bye Bye pores; this gave me the gorgeous finish that the Veil powder has, while also setting my oily skin. This made my foundation last about 6 hours, which is pretty much as good as it gets for me, with only a little breakdown around my nose and no cakiness.

I know this picture to the left is a Snapchat photo (I love that filter, #noshame), but it’s the only photo I remembered to snap all day during the third wear test. I felt so pretty with this foundation on—and honestly, it doesn’t get much better than that. I’m going to keep playing around with applications for this foundation, but I’m pretty pleased that this method works best for me and my skin type. I’ll address other skin types in my final thoughts!

Beauty Guru Hourglass Foundation
Hourglass Vanish Foundation Stick

So what’s my final verdict?

If you are oily skinned, this foundation, like most foundations, will need a little work. As a cream foundation, it is best for normal skin types and maybe even dry-skinned cuties, as it is quite “moist” as far as stick foundations go. The powder is beautiful, but I don’t think it does much for oily skin. If you were going to a short event, the powder would actually probably be perfect: not too drying and absolutely gorgeous on the skin.

If you have dry skin, this foundation might require some testing. Without having dry skin myself, I don’t want to make any absolute calls. However, the powder would be perfect if you have dry skin; the finish is so beautiful and it doesn’t really mattify at all. It’s just really pretty.

If you have normal skin, how lucky are you, honestly? Just kidding; this foundation is really perfect if you don’t have any skin issues, but are looking for full coverage.

Would I repurchase these items? This is where I start to second guess myself. $46 is a lot for a foundation, especially one that, while nice, isn’t the best foundation I’ve ever used for my skin. As well, $46 for a powder that is pretty, but not super effective for my skin? I probably would say I wouldn’t repurchase either one of them. I like them, but I don’t absolutely positively love them—and that’s a big difference.

Want more foundation reviews?

Here are a few more foundation reviews like this one that I think you’ll love.

Disclaimer: As indicated by the asterisk (*) in the title of this post, I received this items from Influenster in exchange for an honest review. However, all opinions remain my own! To learn more about my disclosure policy, click here.

I Tried Birchbox (So You Don't Have To) | April 2019

I Tried Birchbox (So You Don't Have To) | April 2019 | Writing Between Pauses

I love a beauty subscription. As you probably know, I’ve been an Ipsy subscriber for months (although we’ve been on a break recently) and have been looking for other beauty boxes to review and use each month. There is something to a beauty box, isn’t there? It’s like a special little treat.

I told Danny that the reason I love them is because it gives me the option of trying new things every single month… without spending a ton of money. To try a new moisturizer might cost $15+, depending on the brand—but I can get a deluxe sample of a moisturizer in a subscription box that I can use throughout the month, as well as other things to try, all for around $10-15 depending on the subscription.

That’s incredibly valuable to me! I love trying new things, but I hate spending money.

A few weeks ago, I was approached by Birchbox to review their beauty box subscription and to share with my readers. Of course, I said yes immediately!

Birchbox is the first beauty subscription box I ever remember hearing about: they really changed the game when they came on the scene! They are a tried-and-true brand with a ton of fans, so I was honored to be able to work with them.

I received my first beauty box this month and wanted to share everything I received, what I loved about Birchbox, and what I didn’t.

What Do You Get in a Birchbox

What I Got

Here’s everything I received:

  • Oribe Dry Texturizing Spray

  • Number 4 Lumiere d’Hiver Clarifying Shampoo

  • Marcell City Tinted Cream

  • Sunday Riley Luna Night Sleeping Oil

  • 100% Pure Green Tea Concentrate Cream

  • Number 4 Lumiere d’Hiver Reconstructing Masque

  • Love of Color Liquid Shimmer Eyeshadow (not pictured)

That’s $10 for 7 samples. Unlike Ipsy, there is no set number of samples every month. However, some of the samples in Birchbox are quite small; the clarifying shampoo and hair masque are both from the brand Number 4 Lumiere d’Hiver, but the shampoo is 1 fluid ounce in a travel size tube, while the mask is simply a packet (and much less than 1 fluid ounce). For that reason, it’s a lot more difficult to put a value on these products because you do receive a significantly smaller amount!

A prime example is that a full-size tube of the Oribe Texturizing Spray has 8.5 ounces and costs $46; the sample tube I received has 1 ounce. So, it would be valued at about 1/8 of $46: $5.75. However, not everything splits up quite that easily.

That’s ok though! I think even without strict numbers, we can talk about how valuable something feels: even though the tube of Sunday Riley’s Luna oil is quite small, a full-size bottle is only a little over an ounce and costs $105.

You read that correctly: full size is 1 ounce for $105. So receiving a sample tube, no matter the size, is going to be pretty valuable in terms of testing it out!

Birchbox costs between $10-15 a month to receive, depending on the status if your subscription. (You can learn more about Birchbox’s updated payment system here.) You can buy subscriptions in 6- and 12-month packages as well, which can help reduce your cost (and you can often get full-size gifts when you sign up. Score!)

Is Birthbox Worth It?

What I Liked

One of the great things about Birchbox, compared to Ipsy, is that you don’t just receive 5 samples: you get a variety and often 5+ things. In my first box alone, I got 7 samples, some of them bigger than others. I’d say everything except the hair mask, I can use for at least 3 weeks, potentially more. That gives me a ton of product to experience with.

I also like that Birchbox gave me options when it came to selecting my samples. As with Ipsy, the more you review the things you receive, the better the products will be suited to you. However, with Birchbox, you can receive a sneak peek of samples starting the month before; at the end of March, I was able to choose either one sample I definitely wanted in my box, or I could have chosen two curated boxes to receive. That meant that no matter what, I got to choose something to try—which is really, really fun!

I liked all of the products I received, except perhaps the clarifying shampoo (it made my scalp itch, which is 100% a “my scalp” problem!) and the CC cream (it didn’t match my skintone, but I did like the texture).

My favorite product is probably the 100% Pure Green Tea Concentrate Cream; I thought for sure I would love the Sunday Riley Luna oil, which I do, but it doesn’t wow me as much as I thought. What did wow me was the Green Tea Concentrate Cream! It smells amazing and feels beautiful on my skin; I love wearing it under my makeup. It’s one of those things that I would have never looked for, but thanks to Birchbox, I’ll probably be buying a fullsize tube!

Reliable Birchbox Reviews

Things You Need to Know

What are a few things I would want to know about signing up for Birchbox?

Firstly, I think you need to remember that these are samples: not necessarily even deluxe size samples, in some cases. I don’t think that’s necessarily a draw back, but I do think it is important to have realistic expectations of what you’re going to receive.

Secondly, you can earn points on Birchbox by reviewing items; these points can then be used to purchase full size items. That’s pretty amazing!

Lastly, Birchbox is not like ipsy. They are both beauty-focused subscriptions and while I’ve compared and contrasted them here, ultimately they serve two different purposes. Birchbox focuses a little more on tried-and-true skincare products; Ipsy is much more trendy and makeup focused. What you choose depends entirely on what you want to receive! Looking to find a skincare routine that changes your life? Birchbox would be the best choice. Want to experiment with makeup? Ipsy is your best bet.

If you’d like to sign up for Birchbox, you can do so by clicking here**.

Have you received Birchbox? What did you think?

Beauty Review: L'Oreal Paris Rapid Reviver Conditioner*

Beauty Review: L'Oreal Paris Rapid Reviver Conditioner | Writing Between Pauses

My relationship with my hair is complicated.

For the last 12 years of my life, I’ve gone through a series of cut-into-pixie-and-grow-as-long-as-possible periods. I got my hair cut into a pixie just weeks before I had Forrest, then didn’t get a haircut for 3 years. (My hairdresser, as you can imagine, was as shocked as me. It really didn’t feel like 3 years, in my defense.)

In the last year and a half as well, I’ve developed an intensely dry scalp, that can be flaky, but mostly just deeply annoying. Sometimes, it’s tied to my cycle. Sometimes, it’s made worse or better by what I use in my hair. But the baseline for my scalp seems to be dry as hell, with a side of flakiness, and that’s just… my normal as an adult. It goes without saying: of all the terrible genetic traits to inherit, why this one (and my slow as heck metabolism)?

Whenever I look for products for my hair and scalp now, I have to be really clear about what I’m looking for: my hair itself isn’t necessarily dry, but my scalp is; my hair handles sulfate-free shampoos well, but not sulfate-free conditioners; harsh dandruff ingredients irritate my scalp worse; I need moisturizing, but not too much or it weighs down my hair… the list goes on.

When I received this conditioner for review, I was convinced I was going to hate it. The L’Oréal Paris Elvive Extraordinary Oil Rapid Reviver Deep Conditioner has the longest product name in the world (I struggled to shorten it for this blog post) and promises to “provide 2X more nourishment than any leading conditioner” and to be “lightweight, hydrating and moisturizing.” Two of those words mean the same thing, so… we’ll see.

Extraordinary Oil sounds way, way too heavy, doesn’t it? However, despite being called “Extraordinary Oil” and “a hair treatment” in various places both on the L’Oreal website and the tube, it also says it’s for daily use. Now, I subscribe to the idea that you don’t need to (and probably shouldn’t) wash your hair every single day. So using a heavy conditioner every day seems like a lot.

How good is L'Oreal Paris conditioner

I use a lot of hair masks, so I was fully prepared for this conditioner to have the texture of a hair mask. However, it doesn’t. It’s a fairly standard conditioner when you get down to it; it doesn’t feel heavy and it gives your hair that slippy feeling when you apply it. I’ll admit to being fairly addicted to conditioner; I never don’t use it, because my hair can be unmanageable without it. I love the slippy, smooth feeling and even though I know that’s sulfates, and the internet tells me that sulfates are bad for my hair, I also don’t like not using it… because then my hair turns into a single tangle that I can’t get out! Give me sulfates in my conditioner or give me death!

Did I like this conditioner? Yes! I did. It was hydrating for my scalp and didn’t weigh down my hair as much as I thought it would. However, do I think it is anything special? Not necessarily. Despite all the fancy names, it doesn’t really promise to be anything besides a hydrating conditioner—which is what all conditioners do. Whenever I’m testing a hair product, I have to ask myself, over and over again, if I’m noticing a difference in my scalp (better or worse); preferably, it’s actually best that a product has no effect on my scalp. This product is one of those where it didn’t make my scalp better or worse, which is often a solid win for me.

Is this a particularly special conditioner? Not really. It didn’t necessarily wow me in terms of making my hair look any different from any other conditioner. It should be said, again: I don’t really have dry hair, just a dry scalp, and my hair isn’t damaged from heat treatment or hair dye. The bonus is this is only around $4-6 depending on which drug store you go to. (The downside is that L’Oreal Paris tests on animals.) If you’re looking for a good, affordable conditioner, and you struggle with hair that is dry or damaged, this is a great option.

Would I repurchase? It depends. I think if I started heat treating my hair more, I would probably look for something similar (but cruelty free) to use, as it is really hydrating. But this specific product? Probably not.

Disclaimer: As denoted by the asterisk (*) in the title of this blog post, I received this product in exchange for review. If you’d like to learn more about my disclosure policy, click here.